DataSync Snapshot allows you to backup and restore table(s) into the same or different ServiceNow instance. Leveraging the Perspectium DataSync application, you will need to configure the Perspectium properties and apply your Integration Mesh (MBS) credentials. If you choose to restore the table(s) from another ServiceNow instance, you will need to configure the Perspectium properties in the receiving instance with the same Integration Mesh (MBS) credentials.
Once you have created and executed a backup, you will have the option to restore the records in the selected table(s) in your ServiceNow instance or another ServiceNow instance.
![]() NOTE: You will need to have MBS 3.0 to properly run backup and restore. For more information, contact Perspectium Support.
NOTE: You will need to have MBS 3.0 to properly run backup and restore. For more information, contact Perspectium Support.
Prerequisites
![]() You will need the following information from Perspectium Support:
You will need the following information from Perspectium Support:
- Perspectium Integration Mesh (MBS) server URL
- Integration Mesh (MBS) vhost
- Integration Mesh (MBS) username
- Integration Mesh (MBS) password
![]() Then, you will need to install 2 Perspectium update sets to your ServiceNow instance in the following order:
Then, you will need to install 2 Perspectium update sets to your ServiceNow instance in the following order:
- Perspectium Core update set
- Perspectium Backup and Restore update set
Follow the link to Get Started with DataSync for ServiceNow.
Procedure
To get started with Snapshot, follow these configurations:
Navigate to General Settings
Log into your ServiceNow instance and navigate to Perspectium > Control and Configuration > Properties or simply type Control and Configuration in the Filter Navigator on the upper left-hand side of the screen. and then click Properties.
Then, click General Settings.
Enter your Perspectium Integration Mesh (MBS) login info
Type your Perspectium Integration Mesh username, password, and server URL in the appropriate fields.
![]() NOTE: In the username field, you will need to prepend the username with your vhost name, i.e. vhost/user.
NOTE: In the username field, you will need to prepend the username with your vhost name, i.e. vhost/user.
Then, scroll down to the bottom of the page and click Save.
(For restoring to another ServiceNow instance) Repeat Steps 1 and 2
If you are restoring the table(s) in another ServiceNow instance, repeat steps 1 and 2 with the same Integration Mesh (MBS) credentials.
Access Snapshot
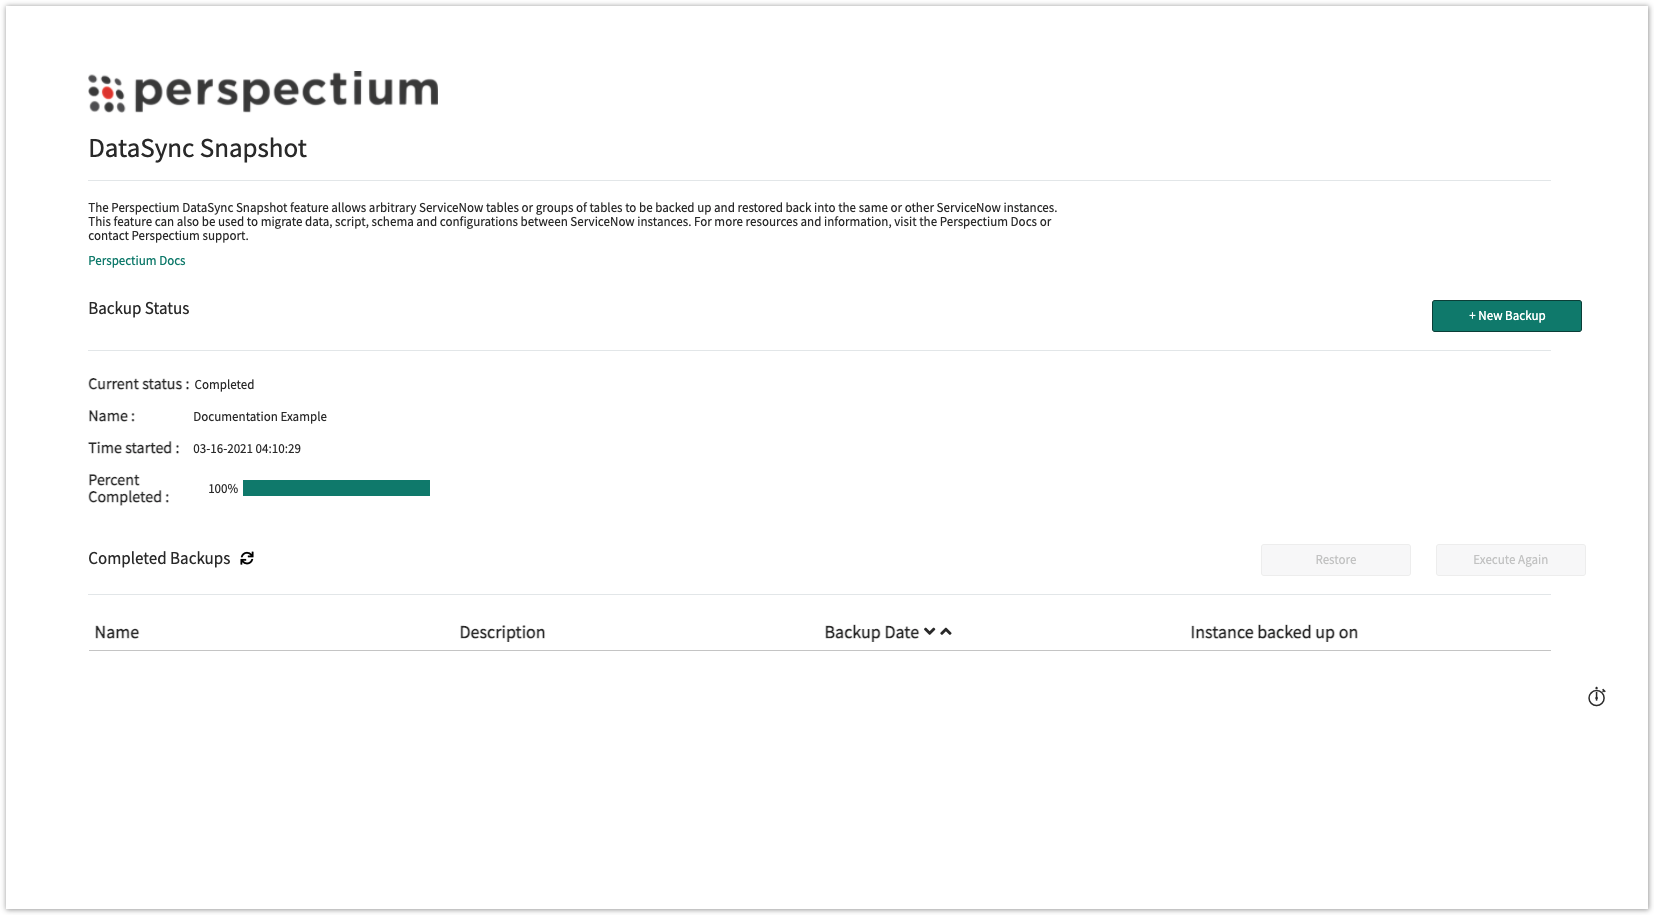
Log into your ServiceNow instance and navigate to Perspectium > DataSync > Snapshot.
Create a new backup
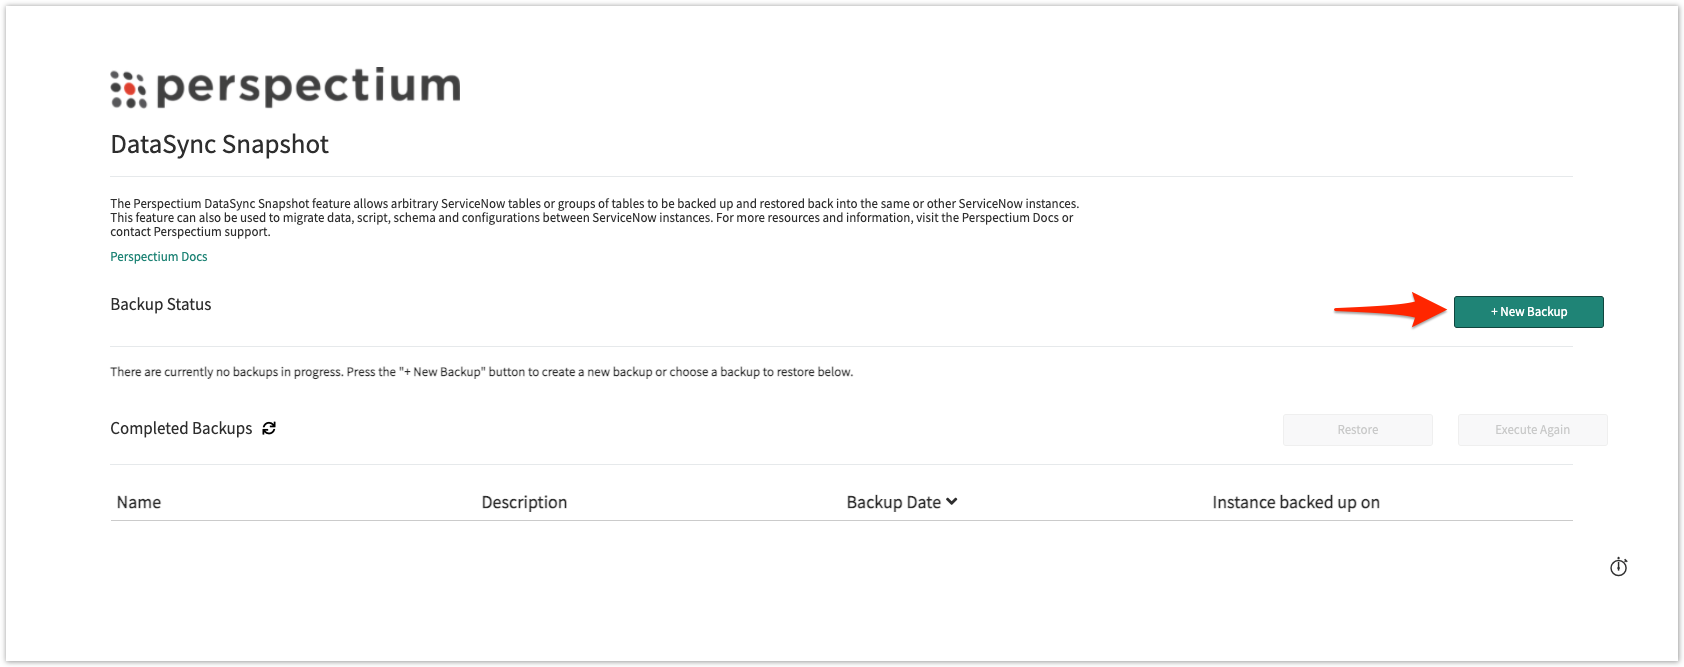
Next to the Backup Status header, click + New Backup.
Fill the required fields
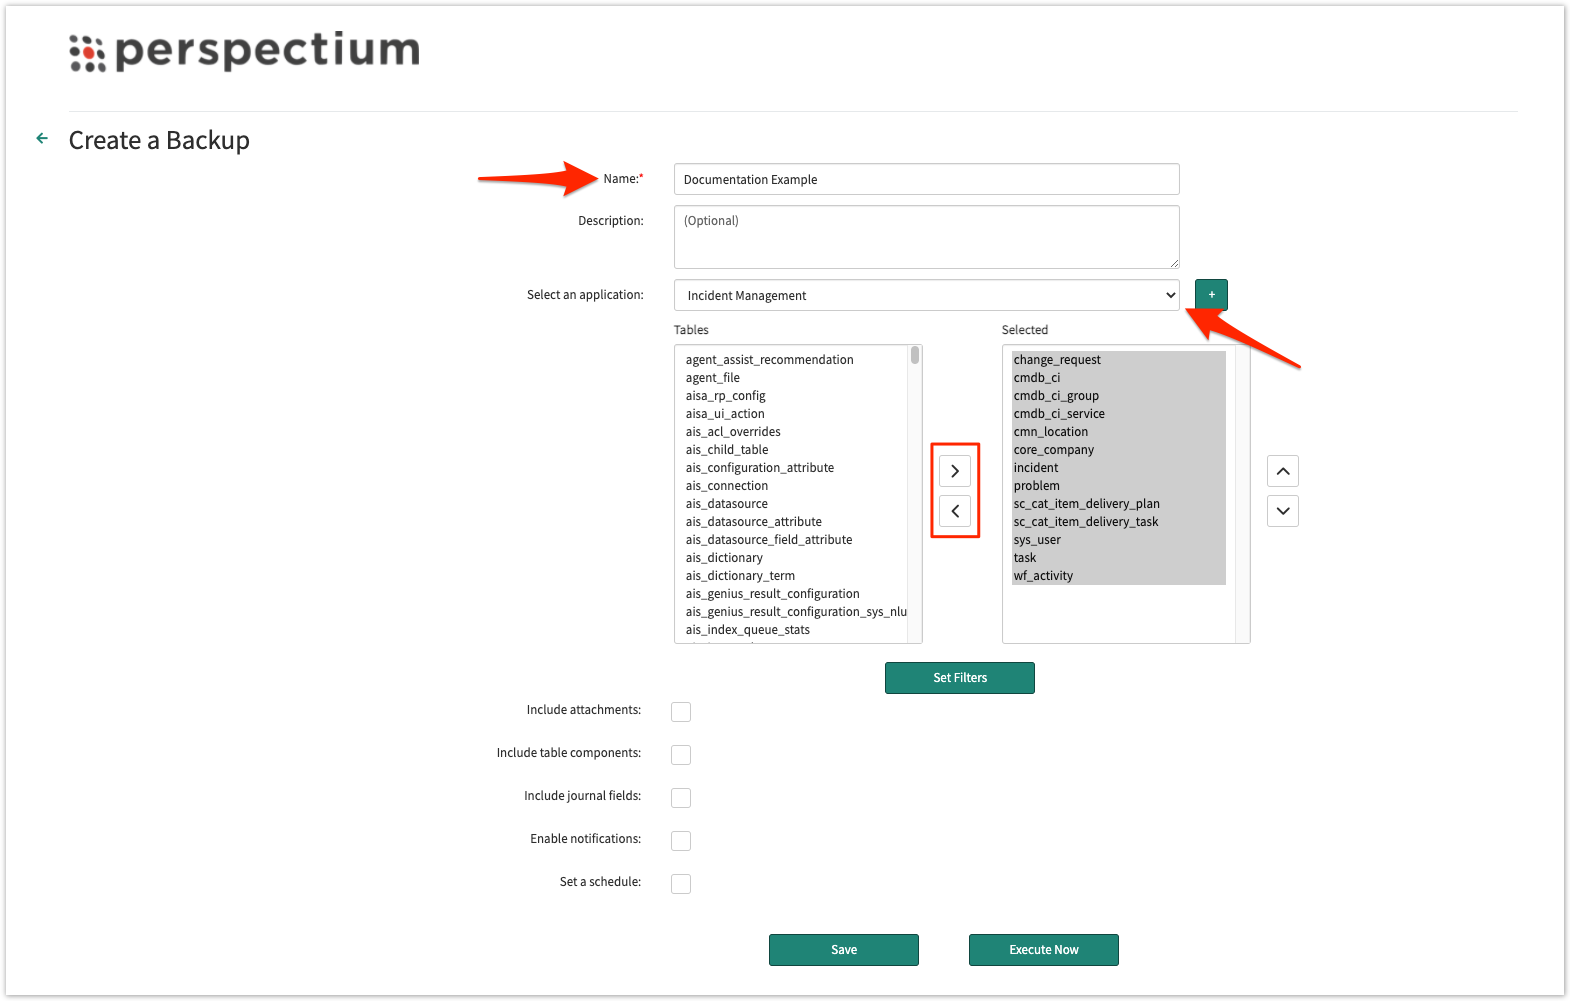
Fill the Name field with the desired name of the backup.
Within the Select an application section, you can either select a table template with the dropdown that will auto populate the list of tables to be shared or manually choose tables with the slushbucket.
![]() NOTE: These templates are tables available in the global scope.
NOTE: These templates are tables available in the global scope.
(Optionally) If you manually chose tables, you can save those selected tables as a custom application template with the + button next to the dropdown.
(Optional) Apply conditions on the selected tables
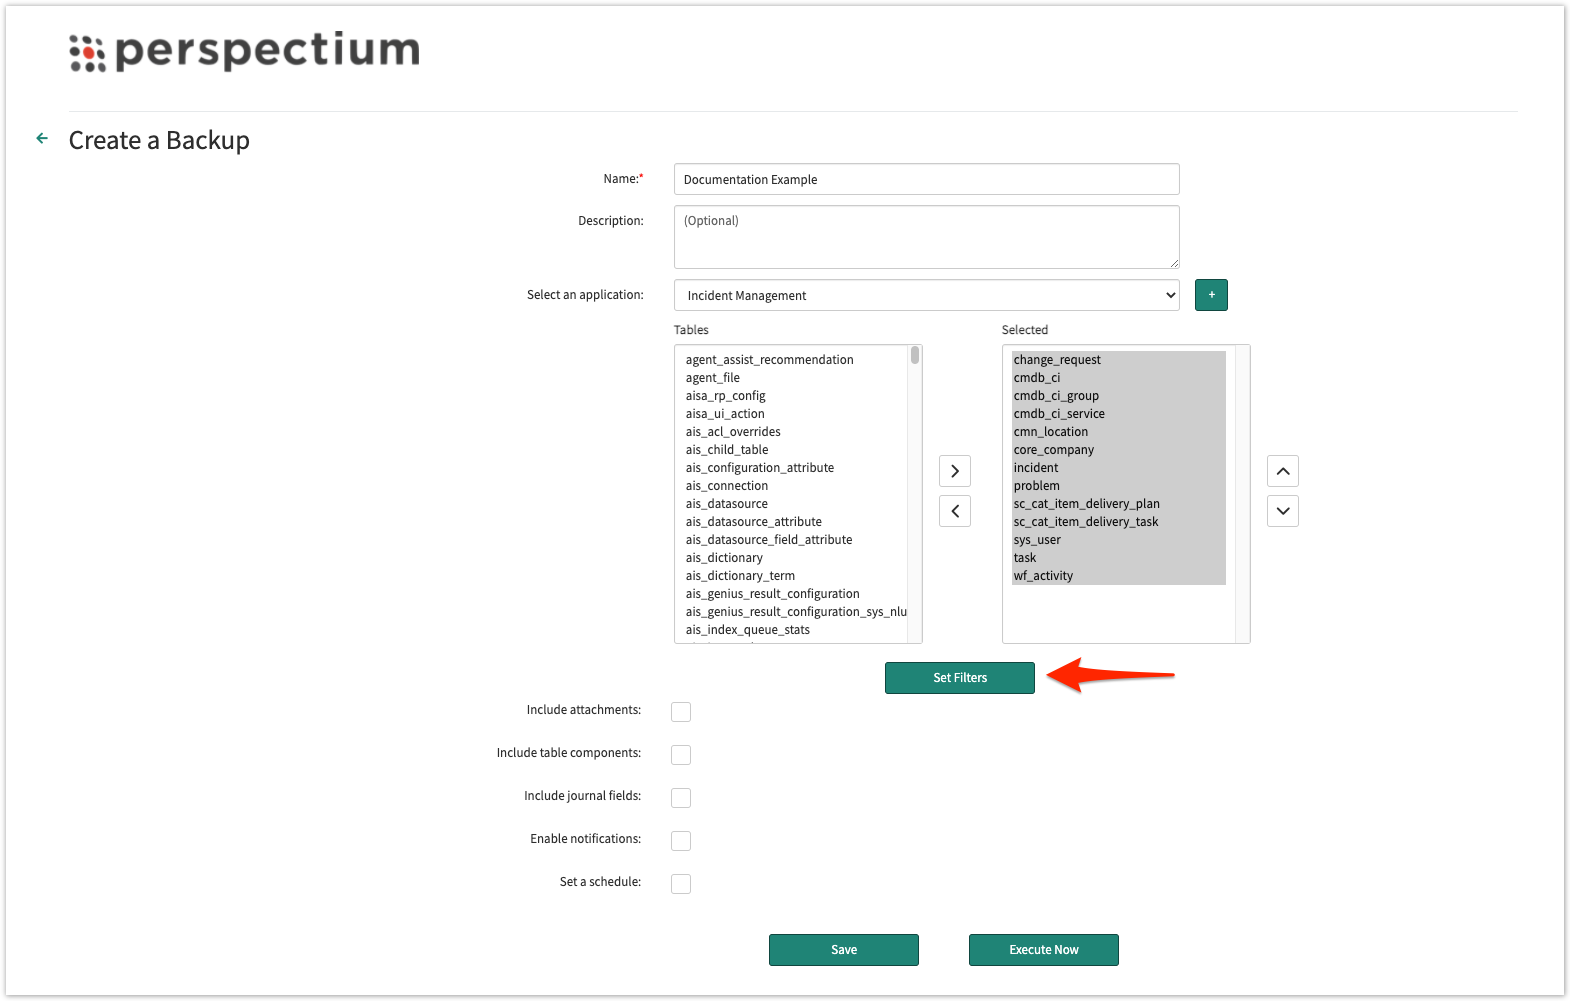
After selecting tables to backup, you have an option to apply conditions to tables that you want to back up. Without setting conditions, the entire tables will be backed up.
To apply conditions, click Set Filters below the Tables to set up your desired conditions.
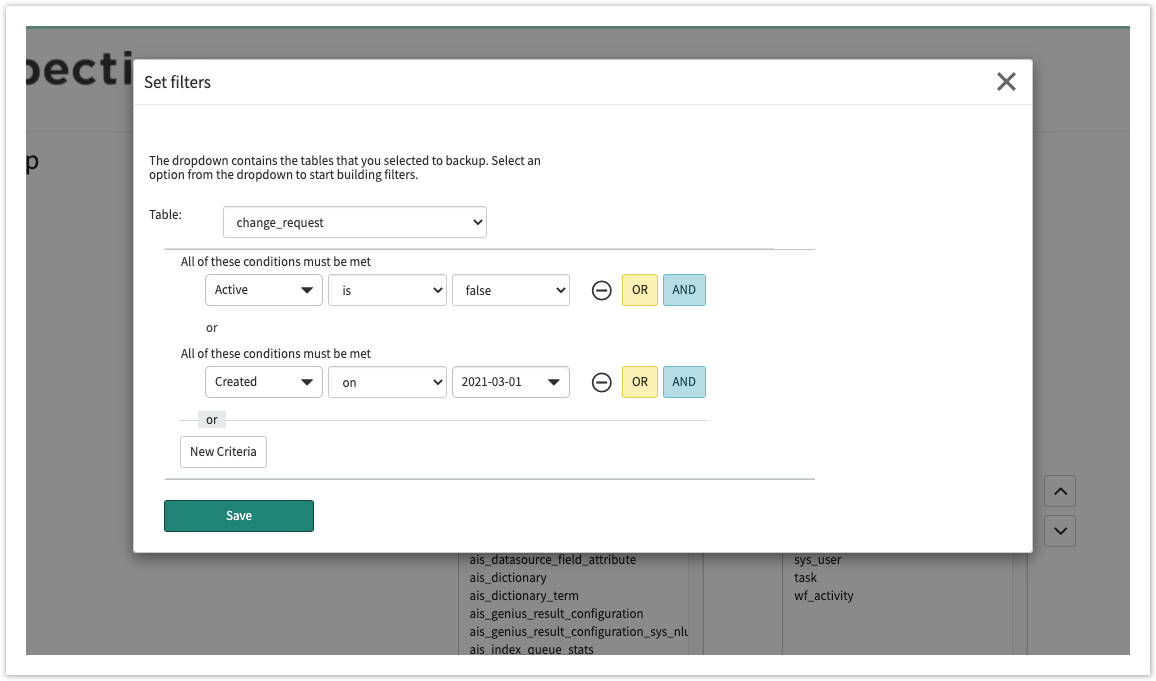
Then, select the table you want to filter and set the conditions with the condition builder.
Enable backup on related tables
To backup attachments (sys_attachment) along with the tables selected, enable Include attachments.
Enable Include table components to backup all the related components needed for the selected table(s), such as:
- Custom fields in the dictionary entry (sys_dictionary)
- Business rule (sys_script)
- Access control (sys_security_acl)
- UI action (sys_ui_action)
- List (sys_ui_list)
- List element (sys_ui_list_element)
- Module (sys_ui_module)
- Form section (sys_ui_section)
To backup journal fields (sys_journal_field) records related to the tables selected, enable Include journal fields.
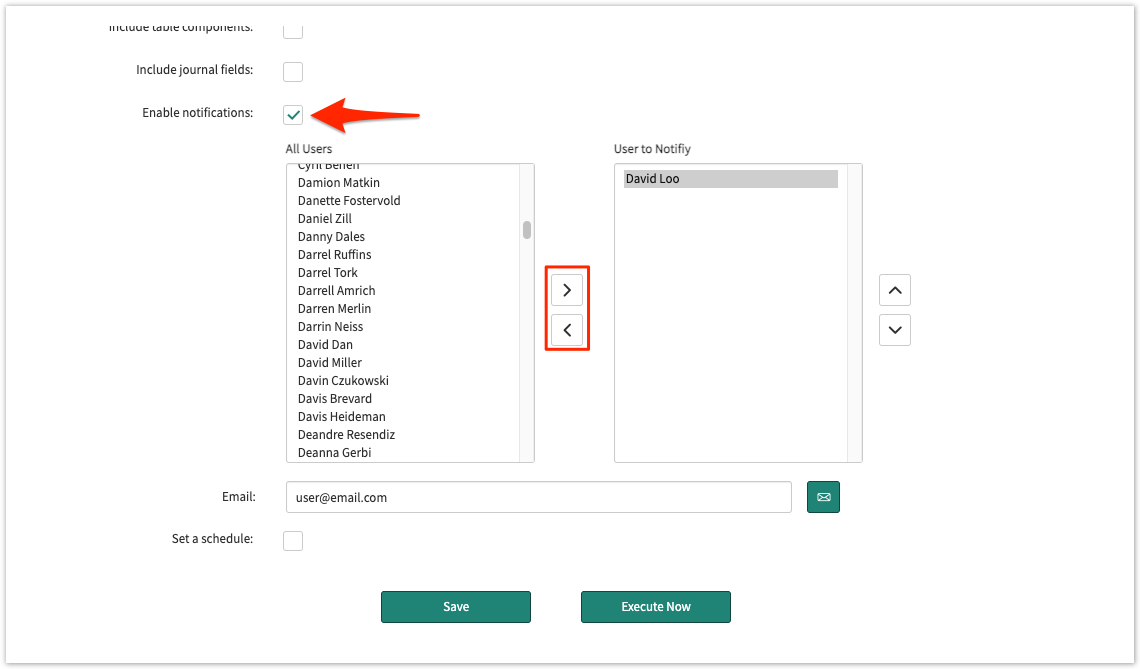
Enable notifications
To enable notification for when backups are completed, check Enable notifications. Then, chose which users will receive the notifications or enter an email.
![]() NOTE: Perspectium notifications are created as ServiceNow email notifications in order to send emails natively through the instance and some notifications use notification email scripts for the email's subject and body content. See email notifications and notification email scripts for more information.
NOTE: Perspectium notifications are created as ServiceNow email notifications in order to send emails natively through the instance and some notifications use notification email scripts for the email's subject and body content. See email notifications and notification email scripts for more information.
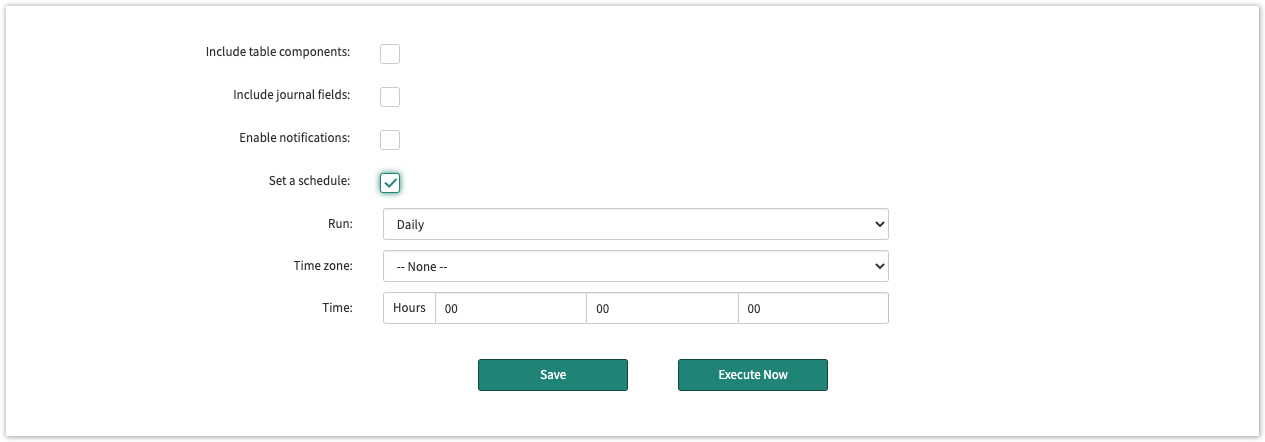
Set a schedule
Instead of executing the backup right away, you can set a up a scheduled back up by enabling Set a schedule. Once activated, you can choose when to run the schedule.
Save or execute the backup
After configuring all the required fields, click Save.
If you did not set a schedule and want to execute the backup right away, click Execute Now.
Access Snapshot
Log into your ServiceNow instance and navigate to Perspectium > Snapshot > Snapshot.
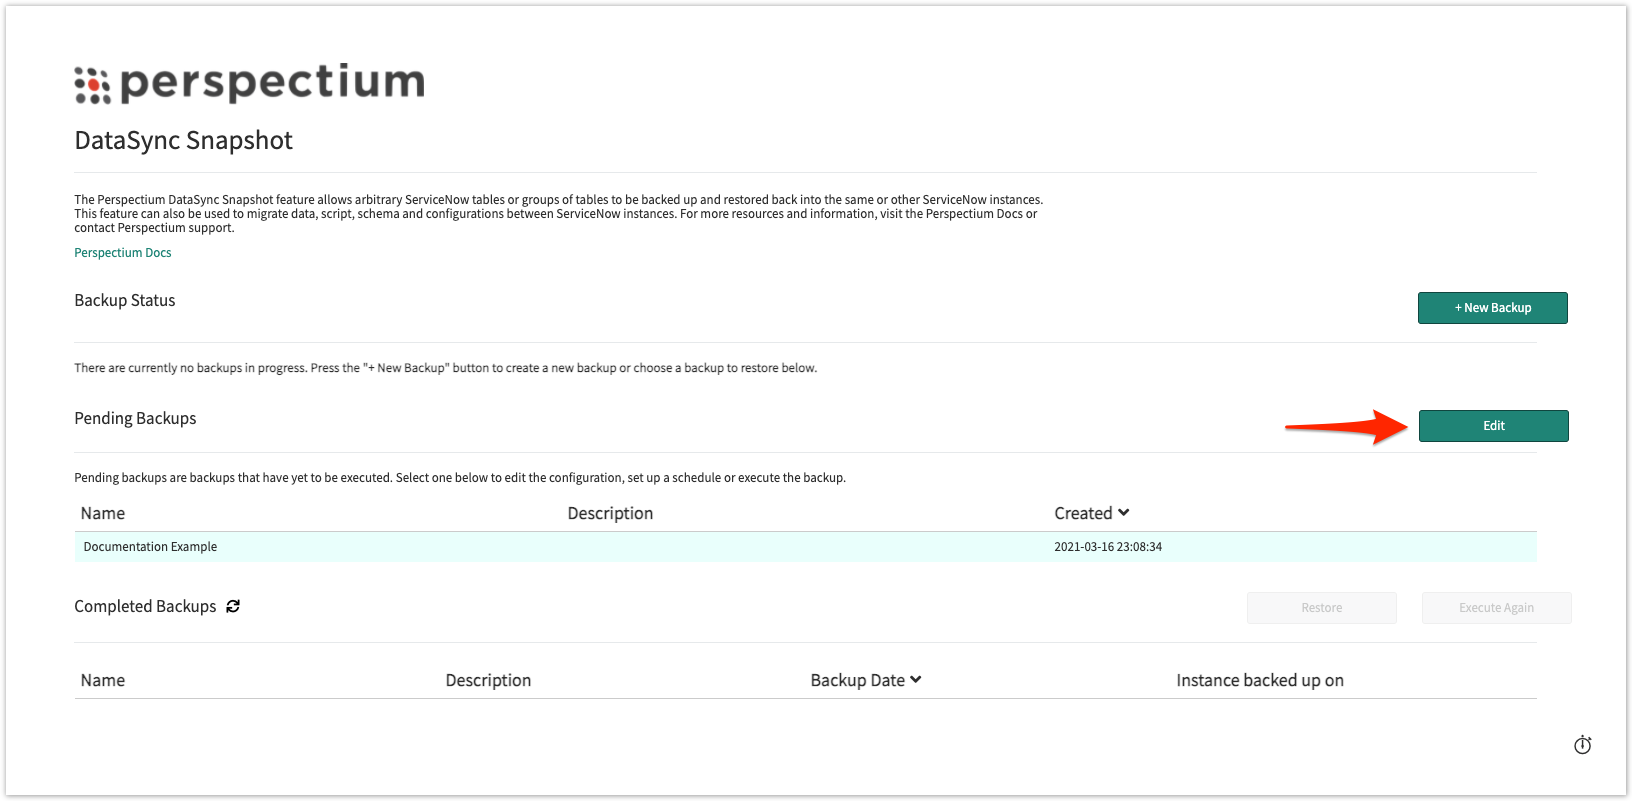
Select a backup
Under Pending Backups, select the backup you want to execute. Then, click Edit.
Execute the backup
On the bottom of the page, click Execute Now.
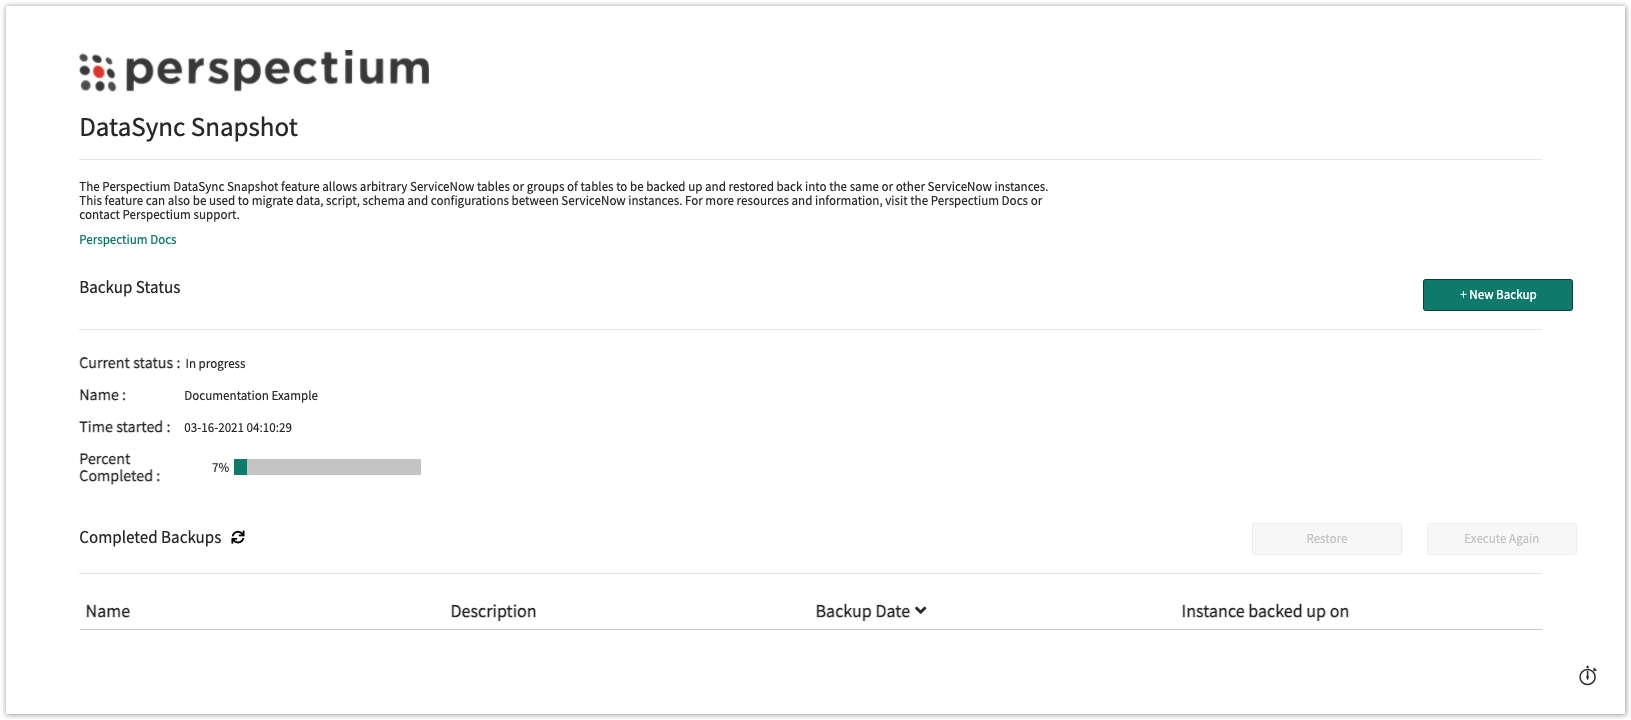
(Optionally) See backup status
Navigate back to Snapshot. Under the Backup Status section, monitor the status of your backup.
![]() WARNING: Restoring a backup will overwrite existing records.
WARNING: Restoring a backup will overwrite existing records.
Access Snapshot
Log into your ServiceNow instance and navigate to Perspectium > Snapshot > Snapshot.
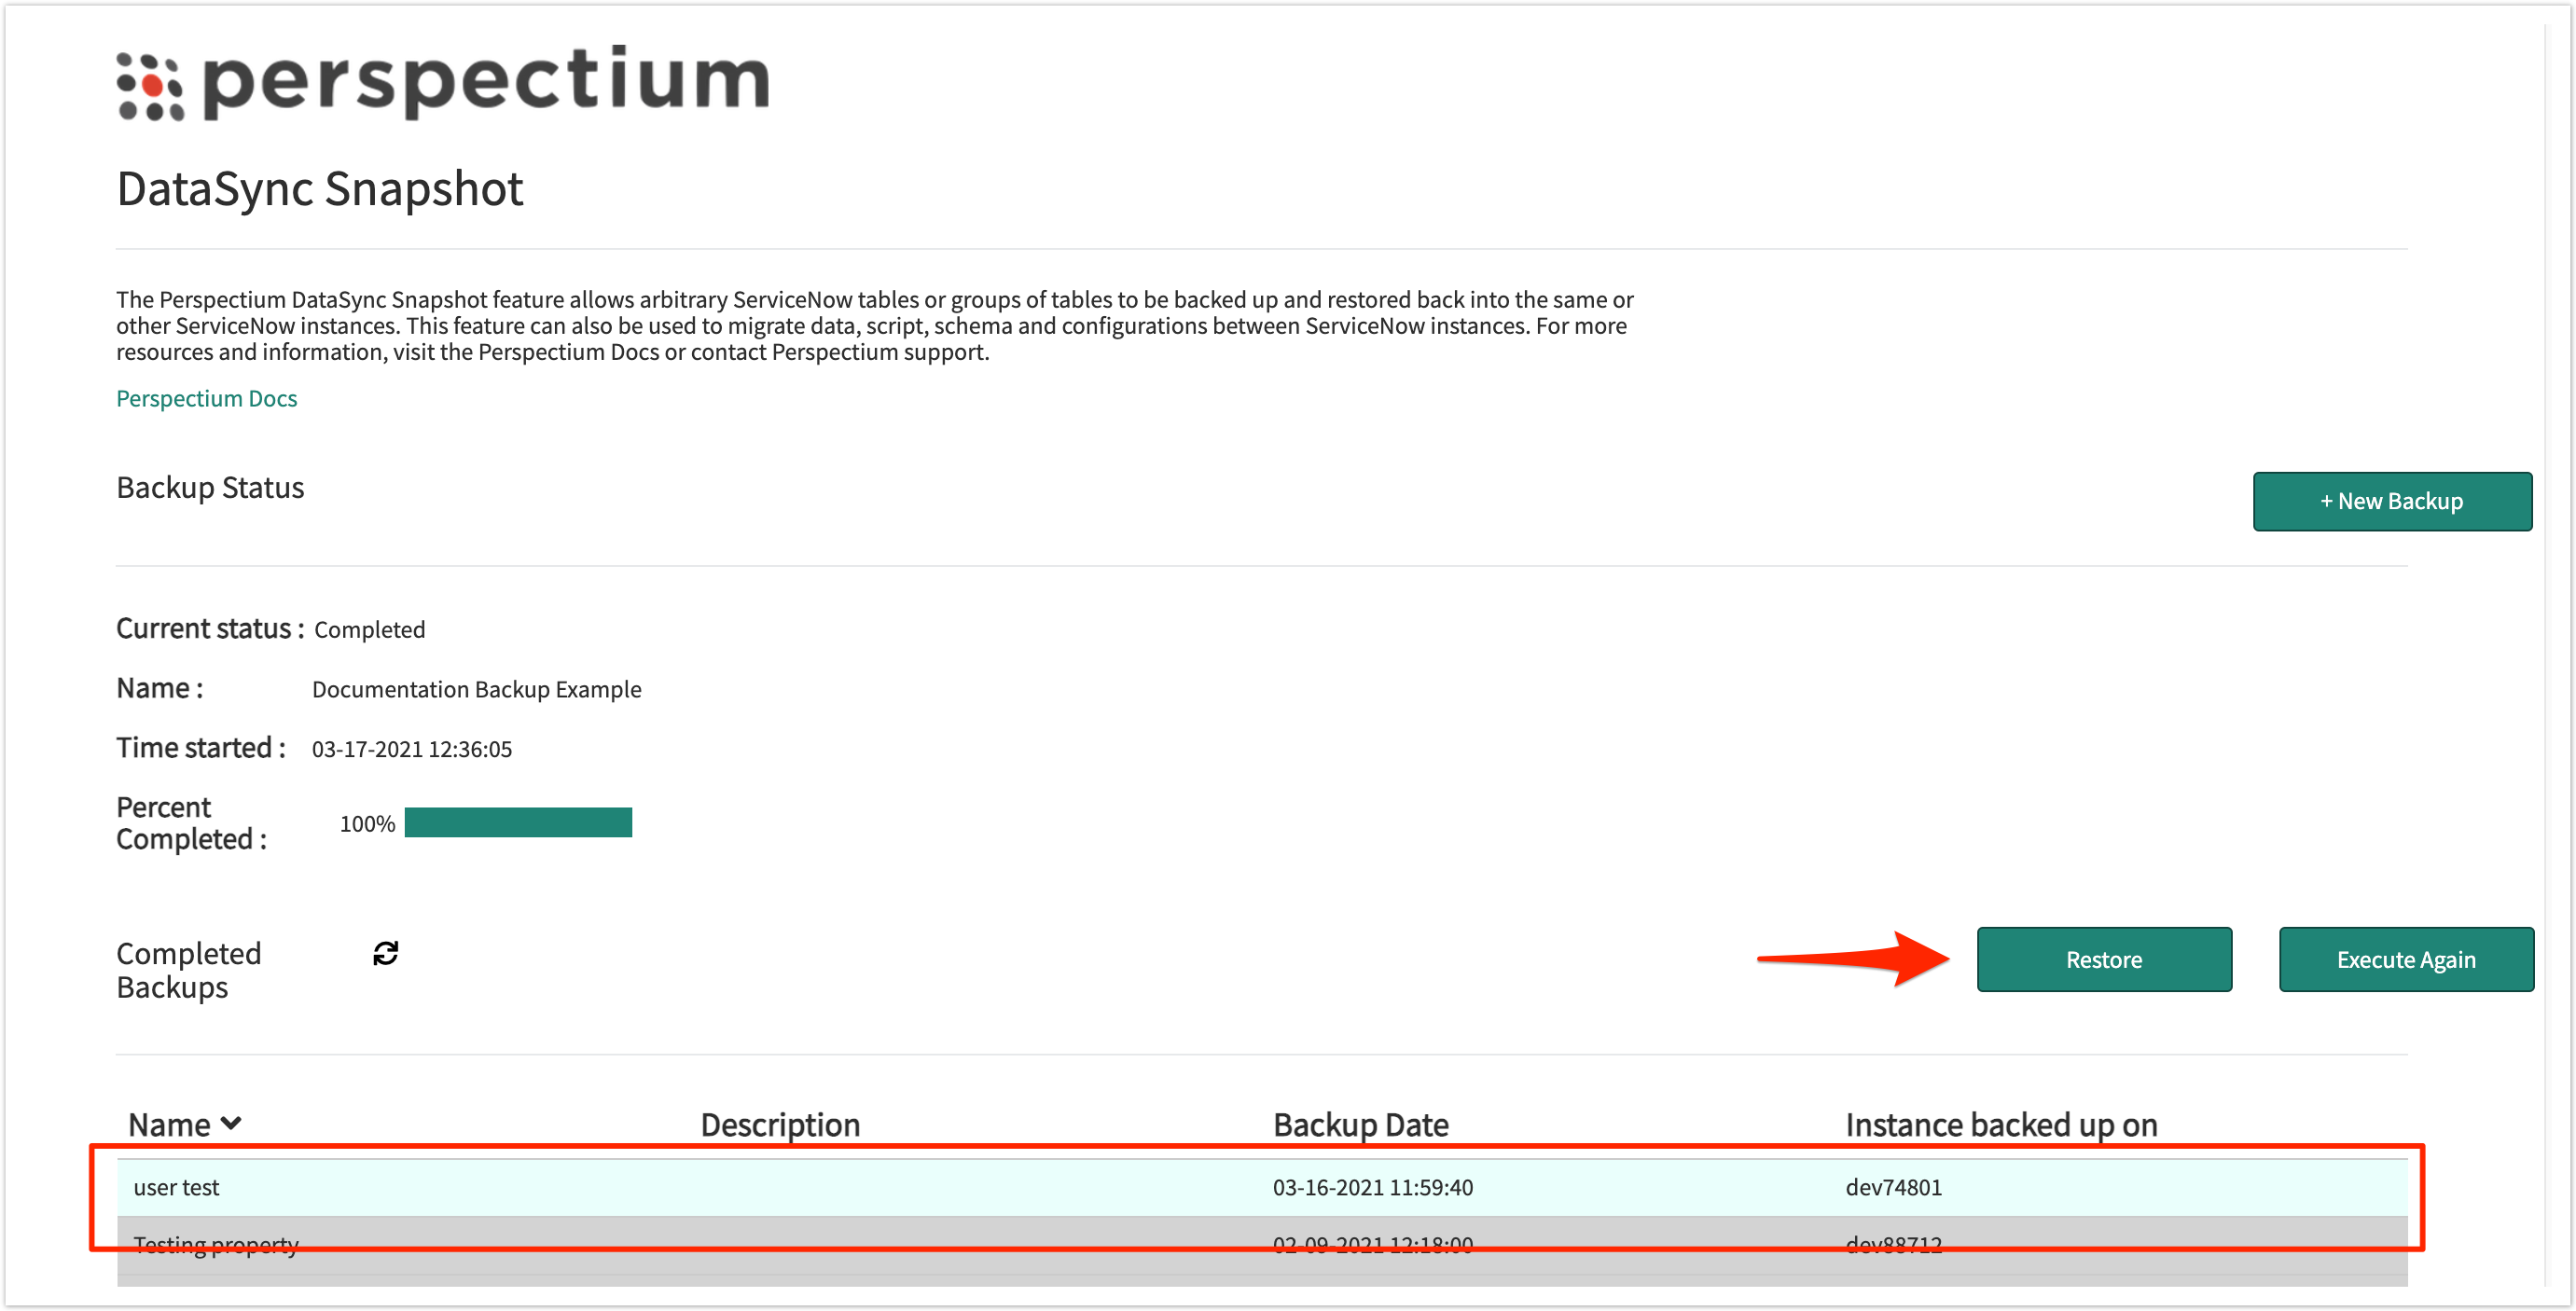
Select a backup to restore
Whether you are restoring in your own instance or another instance, select the completed back up you want to restore. Then, click Restore. You will be prompted to continue and click Ok.
![]() NOTE: If you are restoring the table(s) in another instance, validate that you have the same Integration Mesh credentials. See set up initial configurations for Snapshot.
NOTE: If you are restoring the table(s) in another instance, validate that you have the same Integration Mesh credentials. See set up initial configurations for Snapshot.
Once restore is complete, your ServiceNow instance will start receiving inbound messages (Perspectium > Messages > Inbound) and the restored records in the selected table(s) will appear in your instance.