Page History
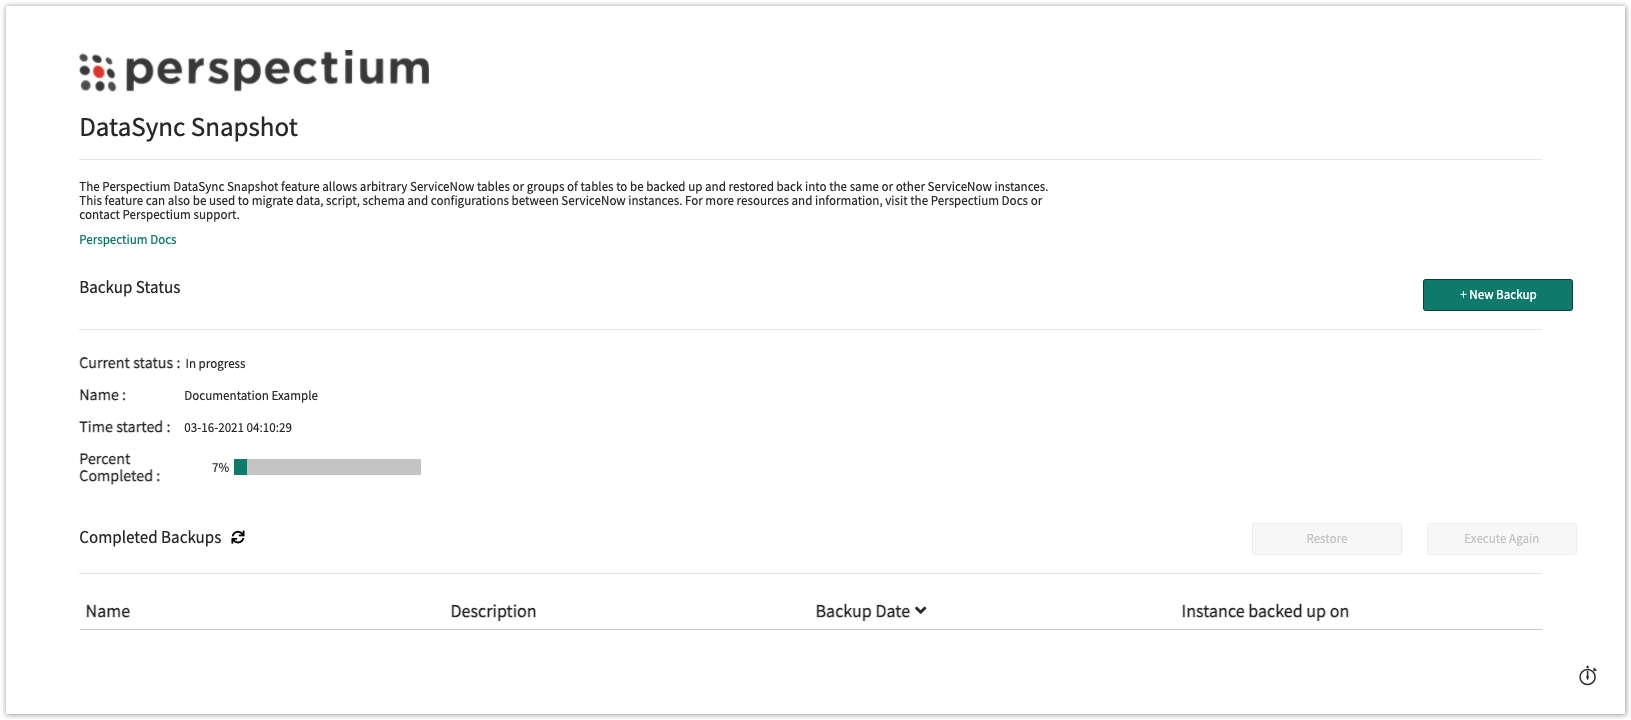
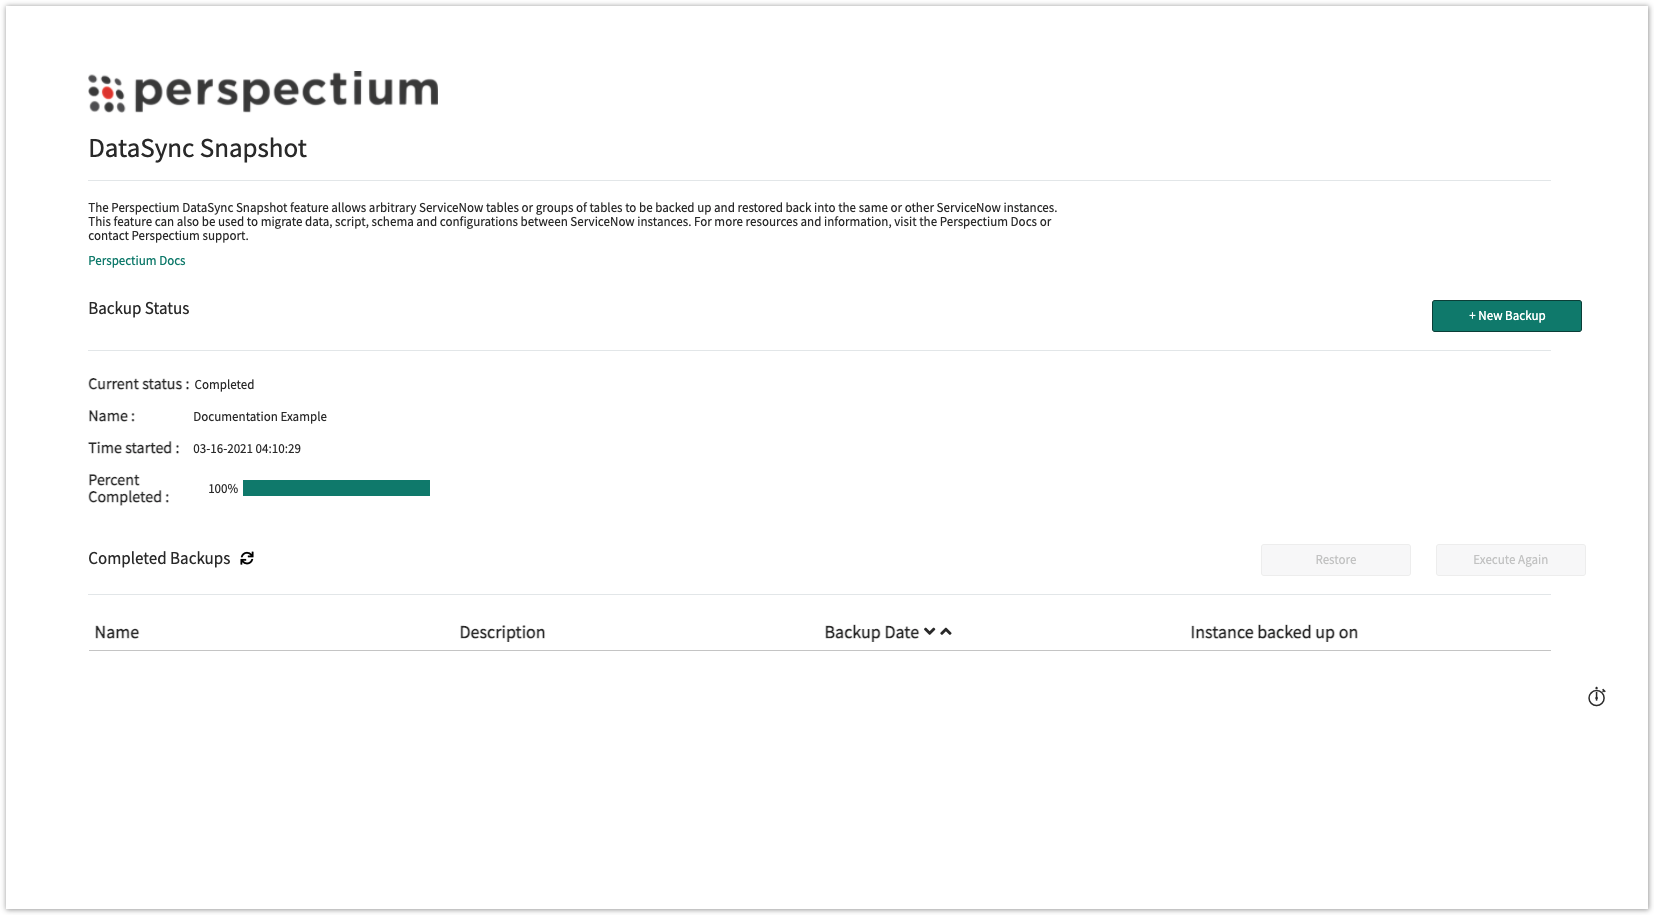
DataSync Snapshot allows you to backup and restore table(s) into the same or different ServiceNow instance. Leveraging the Perspectium DataSync application, you will need to configure the Perspectium properties and apply your Integration Mesh (MBS) credentials. If you choose to restore the table(s) from another ServiceNow instance, you will need to configure the Perspectium properties in the receiving instance with the same Integration Mesh (MBS) credentials.
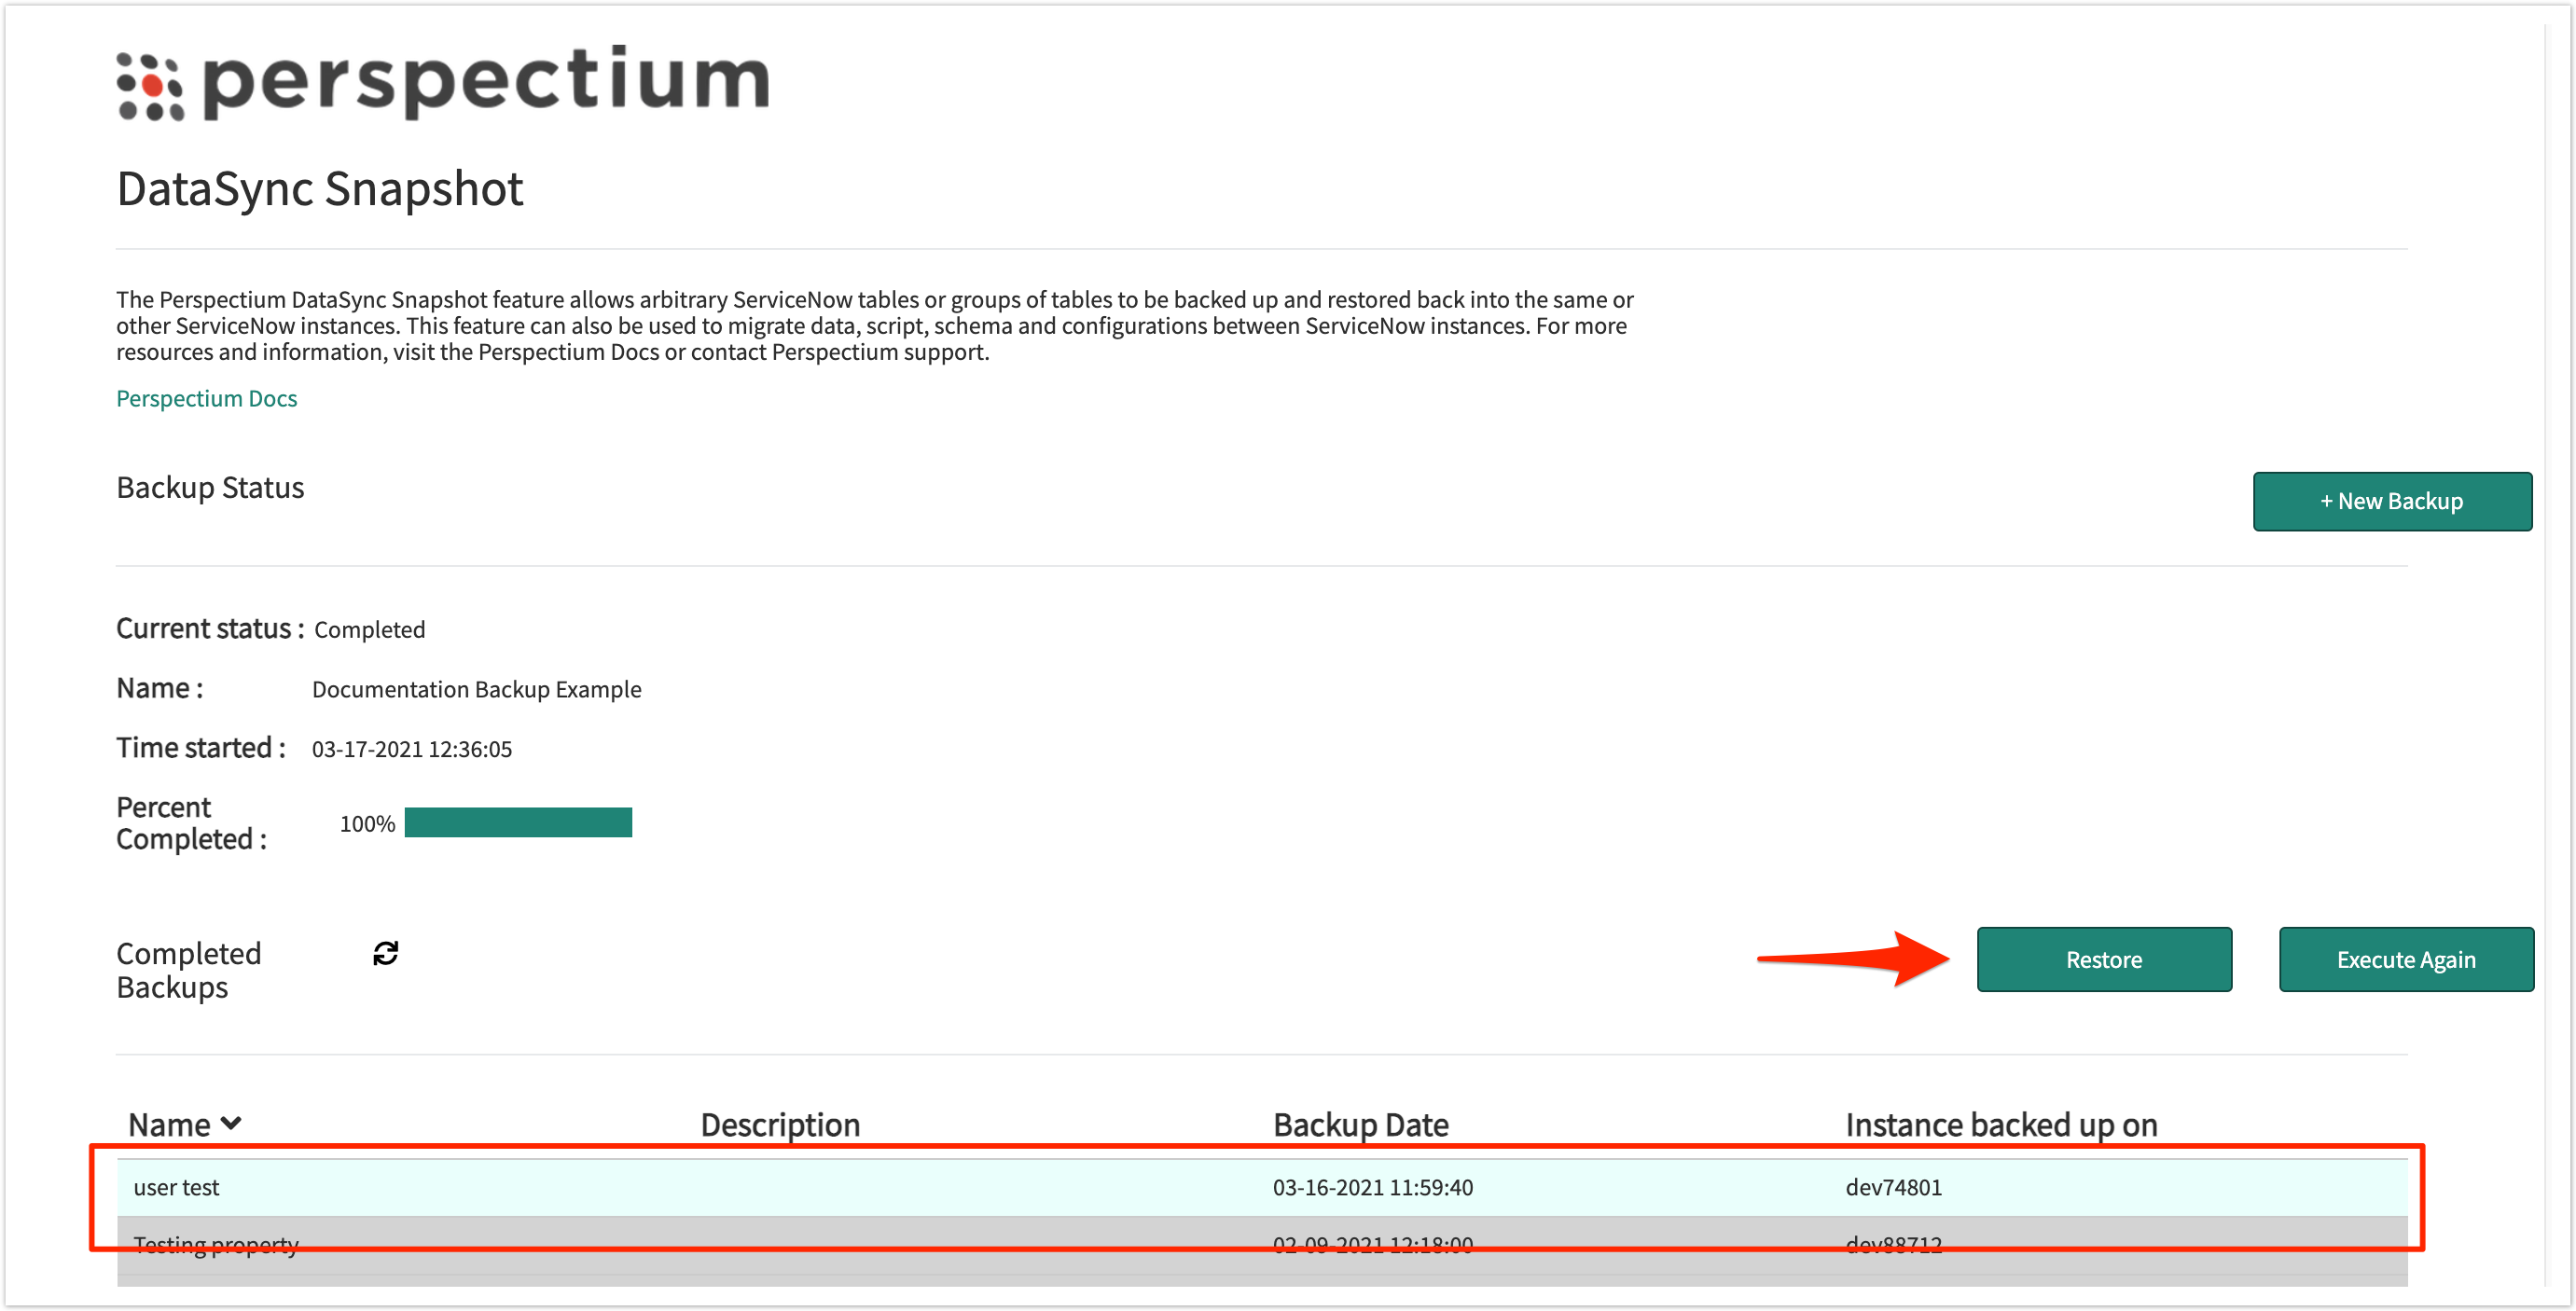
Once you have created and executed a backup, you will have the option to restore the records in the selected table(s) in your ServiceNow instance or another ServiceNow instance.
![]() NOTE: You will need to have MBS 3.0 to properly run backup and restore. For more information, contact Perspectium Support.
NOTE: You will need to have MBS 3.0 to properly run backup and restore. For more information, contact Perspectium Support.
Prerequisites
![]() You will need the following information from Perspectium Support:
You will need the following information from Perspectium Support:
- Perspectium Integration Mesh (MBS) server URL
- Integration Mesh (MBS) vhost
- Integration Mesh (MBS) username
- Integration Mesh (MBS) password
![]() Then, you will need to install 2 Perspectium update sets to your ServiceNow instance in the following order:
Then, you will need to install 2 Perspectium update sets to your ServiceNow instance in the following order:
- Perspectium Core update set
- Perspectium Backup and Restore update set
Follow the link to Get Started with DataSync for ServiceNow.
Initial Setup
Before you begin, you will need set up the initial configurations in Perspectium's General Settings:
| UI Expand | ||||||||||||||||
|---|---|---|---|---|---|---|---|---|---|---|---|---|---|---|---|---|
| ||||||||||||||||
|
Upgrading a ServiceNow application
Learn how to setup and execute backup to prepare your ServiceNow instance for an upgrade.
| Divbox | ||||||||||||||||||||||||||||||||||||||||||||||||||||||||||||
|---|---|---|---|---|---|---|---|---|---|---|---|---|---|---|---|---|---|---|---|---|---|---|---|---|---|---|---|---|---|---|---|---|---|---|---|---|---|---|---|---|---|---|---|---|---|---|---|---|---|---|---|---|---|---|---|---|---|---|---|---|
| ||||||||||||||||||||||||||||||||||||||||||||||||||||||||||||
Before you upgrade your application, you will need to back up the tables in your ServiceNow instance.
Once the tables are backed up, you can upgrade the application. Let’s say something went wrong or the upgrade removed a core functionality, time to restore that backup!
|
Upgrading across different instances
Learn how to backup and restore table(s) when upgrading your application across different instances.
![]() NOTE: Before you begin, validate that you have the same Integration Mesh credentials across the different instances.
NOTE: Before you begin, validate that you have the same Integration Mesh credentials across the different instances.
| Divbox | |||||||||||||||||||||||||||||||||||||
|---|---|---|---|---|---|---|---|---|---|---|---|---|---|---|---|---|---|---|---|---|---|---|---|---|---|---|---|---|---|---|---|---|---|---|---|---|---|
| |||||||||||||||||||||||||||||||||||||
In cases where you have two instances, i.e. one test environment and one developer environment, and you want to upgrade the test environment, you will need to execute a backup.
Let's say you decided |
you decided you wanted to upgrade developer environment as well, but mid-upgrade, you decided not to do so. You can restore the backup from the test environment to the developer environment.
| Create
|
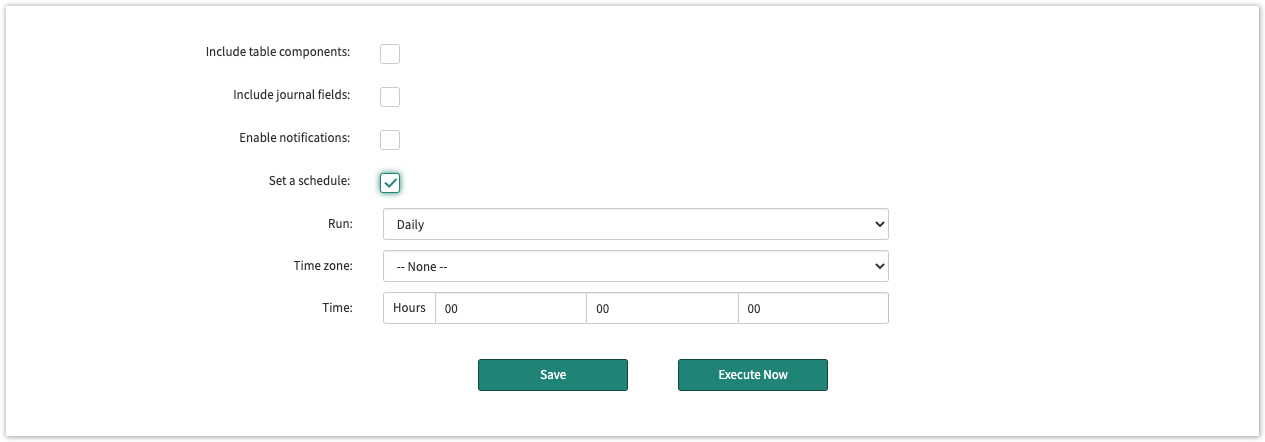
Scheduling backups
Learn how to schedule a backup in your ServiceNow instance.
| Divbox | ||||||||||||||||||||||||||||||||||||||||||||||||||||||||||||||||||||||||||||||||||||
|---|---|---|---|---|---|---|---|---|---|---|---|---|---|---|---|---|---|---|---|---|---|---|---|---|---|---|---|---|---|---|---|---|---|---|---|---|---|---|---|---|---|---|---|---|---|---|---|---|---|---|---|---|---|---|---|---|---|---|---|---|---|---|---|---|---|---|---|---|---|---|---|---|---|---|---|---|---|---|---|---|---|---|---|---|
| ||||||||||||||||||||||||||||||||||||||||||||||||||||||||||||||||||||||||||||||||||||
To prepare for cases where you are experiencing technical difficulties in your ServiceNow instance, i.e. environment breaks, you can set a scheduled backup.
Once you experience an issue, i.e. environment breaks, and you feel the need to restore previous table(s), you can restore the latest backup.
|
General Configurations
| UI Expand | ||||||||||||||||||||||||||||||||||||||||||||||||||||||||||||||
|---|---|---|---|---|---|---|---|---|---|---|---|---|---|---|---|---|---|---|---|---|---|---|---|---|---|---|---|---|---|---|---|---|---|---|---|---|---|---|---|---|---|---|---|---|---|---|---|---|---|---|---|---|---|---|---|---|---|---|---|---|---|---|
| ||||||||||||||||||||||||||||||||||||||||||||||||||||||||||||||
|
| UI Expand | ||||||||||||||||||||
|---|---|---|---|---|---|---|---|---|---|---|---|---|---|---|---|---|---|---|---|---|
| ||||||||||||||||||||
|
| UI Expand | |||||||||||||||||||||
|---|---|---|---|---|---|---|---|---|---|---|---|---|---|---|---|---|---|---|---|---|---|
| |||||||||||||||||||||
|