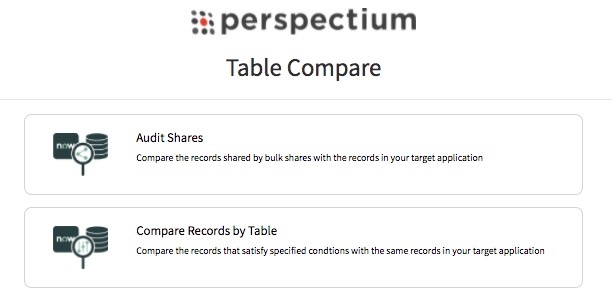
Table Compare (found under DataSync > Tools) allows you to compare tables between two ServiceNow instances (or one ServiceNow instance and another integrated database). This is useful because you can see each table's record count, as well as a list of record discrepancies by sys_id between the two tables you're comparing—in other words, you can see which records exist in one table but not the other.
It checks for the most recent update of the record. If the most recent record is not found, the record will be re-shared.
The table compare messages have a 300s delay by default. We suggest that you configure this property for cases where the compare messages come before all shared messages are received, causing discrepancies. To modify the delay length, go to u_psp_properties.list in the filter navigator, search com.perspectium.table_compare.message_delay in the Name field.
Below are instructions for setting up table compare in different situations:
ServiceNow to ServiceNow table compare
There are two main options when it comes to comparing tables between two instances of ServiceNow:
- Audit Shares looks at the records that have been bulk shared and compare them to the records in another instance. This is useful for ensuring that bulk shares are captured in the subscribing instance properly.
- Compare Records by Table looks at records that satisfy specified conditions and compares them with the same records in another instance. This is useful if you have multiple dynamic/bulk shares on the same table and want to verify that the cumulative sharing of records is captured properly in the database.
Audit shares
The Audit Shares option compares the records shared by bulk shares with the records in another ServiceNow instance. This is useful for ensuring that bulk shares are captured in the database properly.
- Follow the steps to create a bulk share or go to a bulk share that you want to compare at Perspectium > Perspectium Core > Shares > Bulk Share.
- On the bulk share page, in the Miscellaneous tab, check the Advanced box, which will reveal an Advanced tab (if not already there).
- In the Advanced tab, in the Runtime Settings section, check the Enable confirmation box.
- Click Update, and the table compare will automatically occur once the the bulk share has been executed. Now that the bulk share is ready, you can go back into the Tools module.
- Go to Perspectium > Perspectium Core > Tools, and click Table Compare: ServiceNow to ServiceNow.
- Select Audit Shares (for Compare Records by Table, see the next section).
- In the resulting list of all your bulk shares, select the ones that you want to use in the table compare. Make use of the Select All and Deselect All options to easily select or deselect many bulk shares at once.
- Click Run Table Compare to start executing the table compare. Or, click Schedule Table Compare to have the table compare configuration run on a scheduled basis.
Compare records by table
The Compare Records by Table option compares the records that satisfy specified conditions with the same records in your database. This is useful if you have multiple dynamic/bulk shares on the same table and want to verify that the cumulative sharing of records is captured properly in the database.
- Go to Perspectium > DataSync > Tools > Table Compare: ServiceNow to Database > Compare Records by Table/Condition. On the resulting page, you'll use the Condition Builder to build the conditions for the records that should exist in the subscribing database.
- Select a table from the Choose Table dropdown.
- In the Re-share records with this bulk share's configuration field, select a bulk share that will mimic the configurations for re-sharing missing records.
Create a condition with the condition builder or leave it blank to select all records from the chosen table. If the bulk share selected contains conditions, the condition builder will be pre-filled with the same conditions.
- (Optional!) Click Preview to see how many records will be compared.
- Click Add to add the table and condition to the active table compare configuration.
- Click Run Table Compare to start executing the table compare. Or, click Schedule Table Compare to have the table compare configuration run on a scheduled basis.
