On the resulting page, type a name for your Stack name consisting of letters, numbers, and dashes (e.g., Perspectium-On-demand-DataSync). Under Parameters and in the Account & Security Information section, enter your Email Address and accept the License Agreement. Next in the DataSync Server Configuration section, select an AWS Instance Type for the EC2 instance where the DataSync agent will run on, specify a range of IP addresses (as a CIDR block; e.g. 192.168.0.0/16, 0.0.0.0/0, etc.) in the IPRangeforEC2SSH field that will be able to SSH to your EC2 instance where the DataSync Agent is running. Then, choose a previously created EC2 Key Pair for authentication when accessing your EC2 instance via SSH.  NOTE: If you haven't already created an EC2 Key Pair, you can create one within your AWS account or using a command line interface. NOTE: If you haven't already created an EC2 Key Pair, you can create one within your AWS account or using a command line interface.

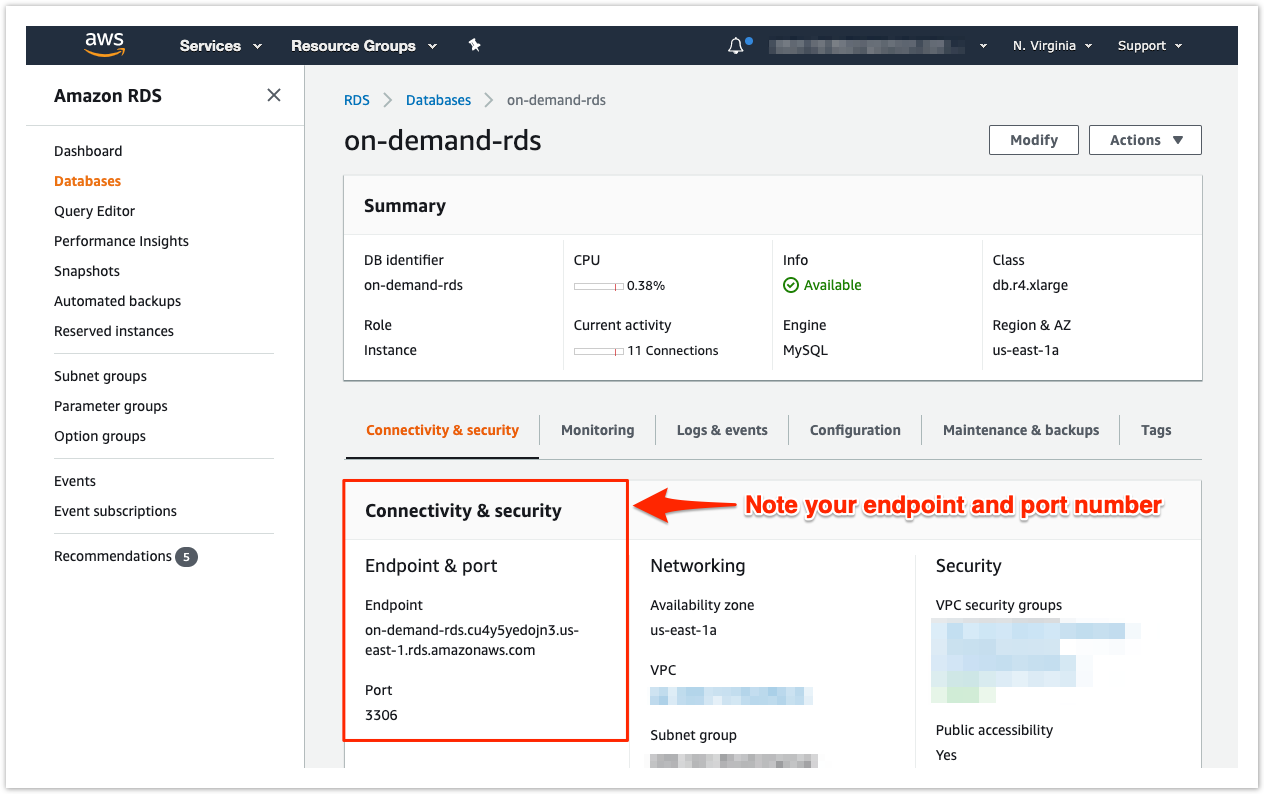
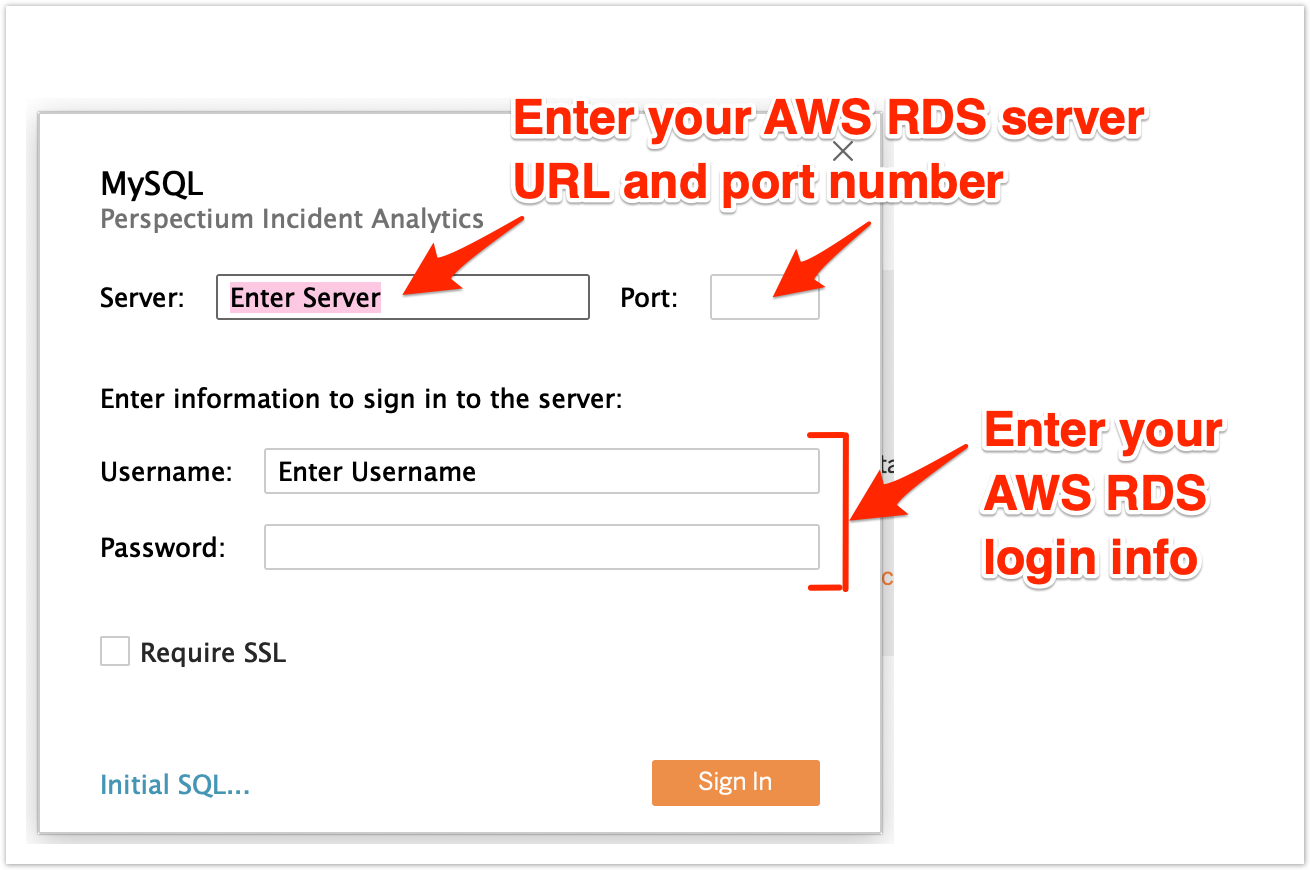
In the Database Configuration section, choose the Database Type that you want to sync your ServiceNow incident data with from the DBType field. Then, specify a range of IP address (as a CIDR block; e.g. 192.168.0.0/16, 0.0.0.0/0, etc.) used to connect to your AWS RDS. NOTE: This should include the IP address of the EC2 instance created with this stack so the DataSync Agent can connect to the RDS to save data. It is recommended you use the value of 0.0.0.0/0 and then change it after the stack has completed to update to the IP address of your EC2 instance if you want to restrict access to only the instance. You can optionally enter an existing RDS (if you have already created one in your AWS account) or Snowflake database to use by entering its URL and credentials in the ExistingDBurl, ExistingDBusername and ExistingDBpassword fields. NOTE: Snowflake requires you enter an existing Snowflake database as Snowflake currently cannot be created through an AWS CloudFormation. 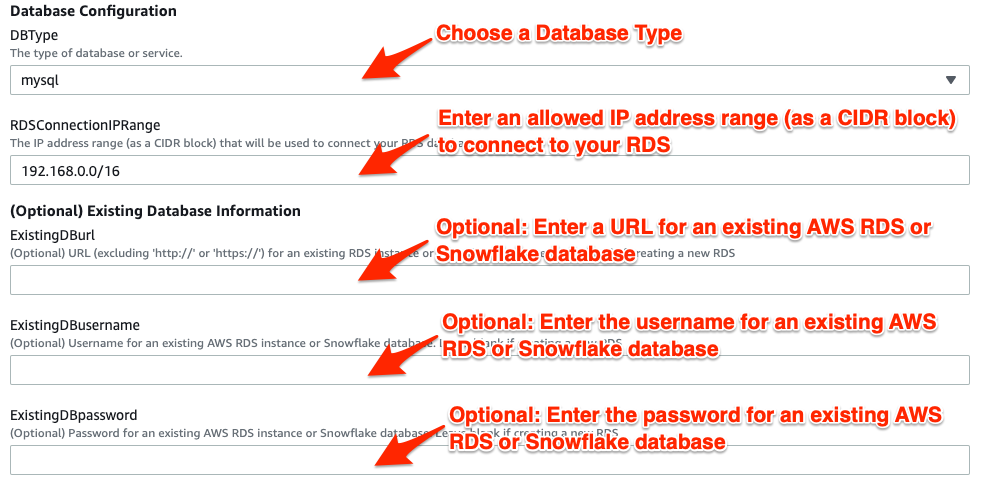
Finally, click Next to go on to the Configure stack options page. |