Page History
| HTML |
|---|
<style>
.release-box {
	height: 30px;
	width: 100px;
	padding-top: 8px;
	text-align: center;
	border-radius: 5px;
	font-weight: bold;
	background-color: #0ACA8B;
	border-color: #FCE28A;
}

.release-box:hover {
  	cursor: hand;
    cursor: pointer;
    opacity: .9;
}
</style>
<meta name="robots" content="noindex">

<div class="release-box">
<a href="https://docs |
.perspectium.com/display/ |
fluorineplus" style="text-decoration: none; color: #FFFFFF; display: block;">
Fluorine+
</a>
</div> |
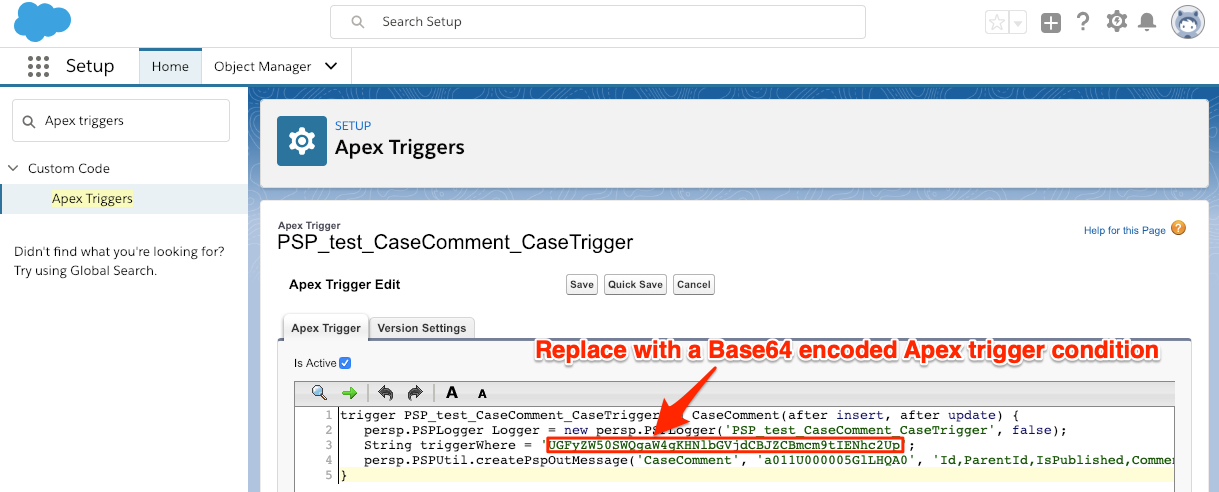
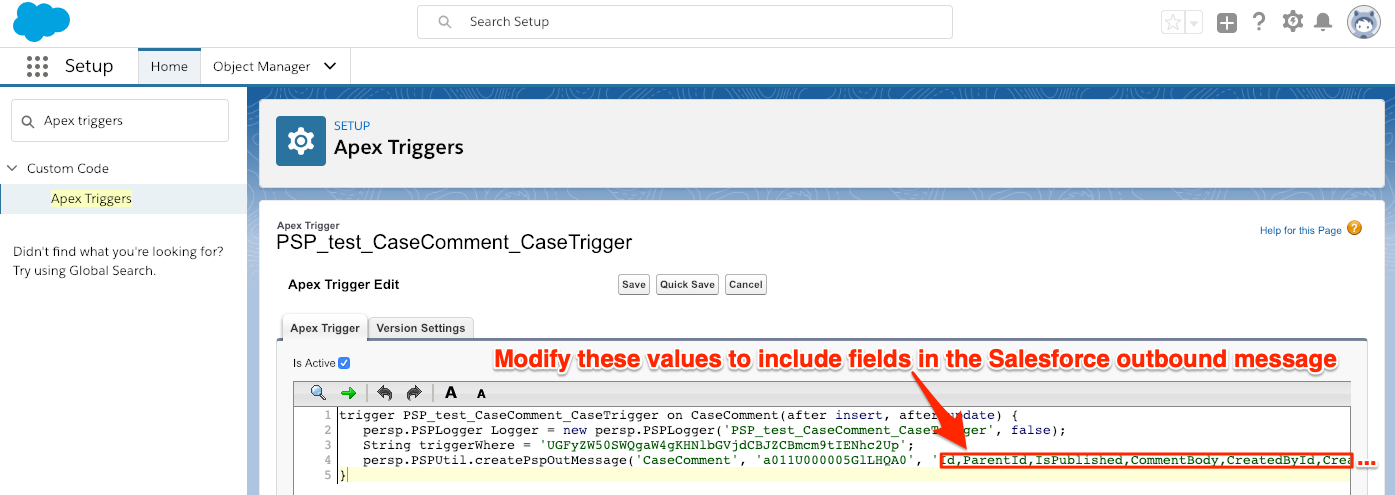
Salesforce Apex triggers for your Salesforce service integration indicate the conditions that will trigger your Salesforce dynamic share. The conditions for the SOQL query that runs as part of a dynamic share's Apex trigger can be manually configured on the Apex Triggers page. To modify the default Apex triggers created for your Salesforce service integration, you will need to create a Base64 encoded condition and specify the fields you want to include in the dynamic share's outbound messages.
| Warning |
|---|
WARNING! If you plan to make additional changes to your Apex triggers after manually modifying them, follow the procedure shown below (rather than modifying your Apex triggers in the dynamic share form) to ensure that the manual modifications to your triggers are not overridden. |
Prerequisites
![]() First, you will need to follow the steps to get started with SalesInsight.
First, you will need to follow the steps to get started with SalesInsight.
![]() You will also need to ensure that the Active, Create, Update, and Include Attachment boxes are checked for your Salesforce dynamic shares.
You will also need to ensure that the Active, Create, Update, and Include Attachment boxes are checked for your Salesforce dynamic shares.
Procedure
To modify the Apex triggers for your Salesforce SIAM integration, follow these steps:
| UI Steps | ||||||||||||
|---|---|---|---|---|---|---|---|---|---|---|---|---|
|
Similar topics
| Content by Label | ||||||||||
|---|---|---|---|---|---|---|---|---|---|---|
|