Page History
Once you have installed and configured DataSync for ServiceNow, and have successfully set up a bulk share and understand how it works, there are various optional dynamic share settings that you can configure. These optional features can help you customize your DataSync experience and leverage DataSync's robust capabilities to make your organization's integration processes more powerful and streamlined.
| Panel | ||||||
|---|---|---|---|---|---|---|
| ||||||
|
Explore all of these available features below!
Bulk share history set data
This feature allows you to share history set data for the table that you are bulk sharing. History sets in ServiceNow identify which particular records from an audited table contain historical information. History set records only contain a recent subset of historical information (within the past 30 days of inactivity). The following fields will be visible to you in list view for history sets:
Field | Description |
|---|---|
| ID | An identifier for the record whose history is being recorded |
| Table | The audited table for the record whose history is being recorded |
| Load Time | The amount of time it took to generate the history set |
For more information about ServiceNow history sets, see history sets and differences between audit and history sets.
Here's how to enable the sharing of history set data for a bulk share:
- In your sharing ServiceNow instance, go to Perspectium > Perspectium Core > Shares > Bulk Share > View Bulk Shares.
- Find and click into the bulk share (the clickable timestamp) that you want to share the history set data for.
- In the resulting bulk share page, click the Miscellaneous tab, and check the Include history set box.
- Click Update.
| Info |
|---|
With DataSync Agent, this option will create a sys_history_xxx table on the target database. |
Clone a bulk share
This feature allows you to simply clone an existing bulk share or clone and immediately run an existing bulk share.
- In your sharing ServiceNow instance, go to Perspectium > Perspectium Core > Shares > Bulk Share > View Bulk Shares.
- Find and click into the bulk share (the clickable timestamp) that you want to clone.
- In the resulting bulk share page, scroll down to the Related Links section, and click Clone bulk configuration to create a duplicate of the current bulk share, or click Clone and run bulk share to create a duplicate of the current bulk share and then immediately execute the newly duplicated share.
Preview a bulk share
This feature allows you to preview a bulk share before executing it. You can see how many records will be shared out and details about when the shared records were created.
| UI Expand | ||
|---|---|---|
| ||
|
Here's how to preview a bulk share:
- In your sharing ServiceNow instance, go to Perspectium > Perspectium Core > Shares > Bulk Share > View Bulk Shares.
- Find and click into the bulk share (the clickable timestamp) that you want to preview.
- In the resulting bulk share page, scroll down to the Related Links section, and click Preview.
- On the resulting preview page, you'll see a the number of records to be shared, and a graph showing when the records were created. Click the menu icon (≡) if you want to download the graph. Click Back to Bulk Share to return to the bulk share record.
Run a bulk share as another user
This feature allows you to run a bulk share as another user, rather than the default system user that has access to all of the table's records. This feature can be useful when you want to limit the bulk share to a subset of data that certain users have access to, such as records in one domain in your domain separated instance.
Here's how to enable this feature:
- In your sharing ServiceNow instance, go to Perspectium > Perspectium Core > Shares > Bulk Share > View Bulk Shares.
- Find and click into the bulk share (the clickable timestamp) that you want to run as another user.
- In the resulting bulk share page, click the Miscellaneous tab, and click the search icon (magnifying glass) next to the Run as field.
- Choose the user to run as for your bulk share.
- Click Update.
Run a bulk share again
This feature allows you to run an existing bulk share again, once it has a status of Completed. You may want to run the same bulk share multiple times if your intent is to migrate the same table data intermittently.
Here's how:
- In your sharing ServiceNow instance, go to Perspectium > Perspectium Core > Shares > Bulk Share > View Bulk Shares.
- Find and click into the bulk share (the clickable timestamp) that you want to run again. It must have a Completed status.
- In the resulting bulk share page, click Execute Again in the top right corner.
Bulk share only sys_id listed
This feature allows you to bulk share out only the sys_ids for specific records. This is useful for when you don't want to create filters for a bulk share.
Here's how:
- In your sharing ServiceNow instance, go to Perspectium > Perspectium Core > Shares > Bulk Share > View Bulk Shares.
- Find and click into the bulk share (the clickable timestamp) for which you want to share only the sys_ids on specific records.
- In the resulting bulk share page, click the Data Enrichment tab, and check the Share only Sys IDs listed box.
- Then, scroll down and click the Sys IDs tab. This tab will only appear once you check the box from Step 3.
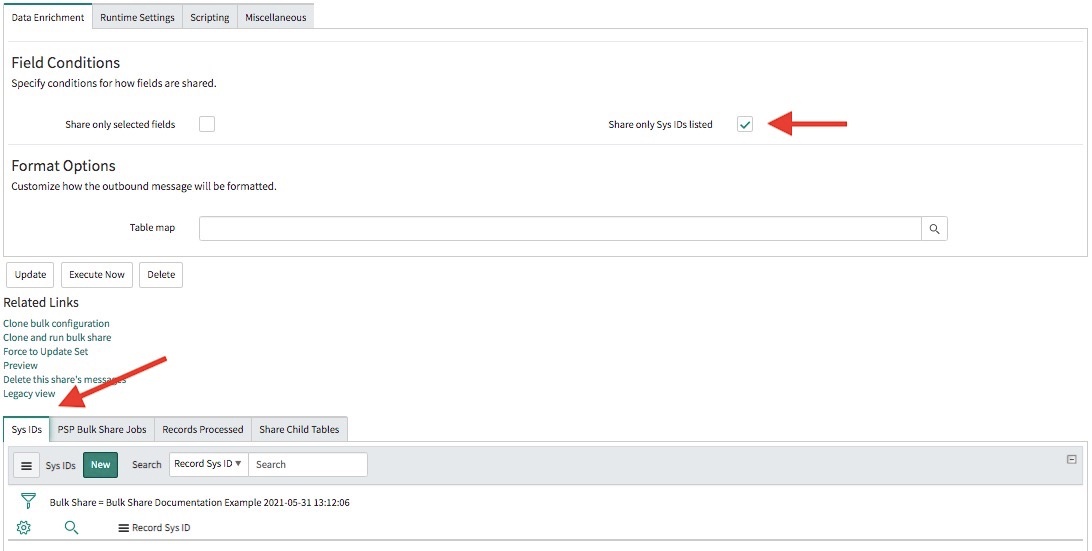
- In the Sys IDs tab, click New. If using Google Chrome, you may see a popup asking if you want to leave the site—click Leave.
- On the resulting page, type the sys_id for the first record you want to bulk share out in the Record Sys ID field.
- Click Submit.
- (Optional!) Repeat steps 5-7 for any other record sys_ids you want to bulk share out.
- Once you've added all sys_ids, click Update.
Share database views with bulk share
Limit the number of records shared
This feature allows you to limit the number of records shared once bulk share reaches a specific limit.
Here's how to turn it on:
- In your sharing ServiceNow instance, go to Perspectium > Perspectium Core > Shares > Bulk Share > View Bulk Shares.
- Find and click into the bulk share (the clickable timestamp) that you want to limit the number of records shared on.
- In the resulting bulk share page, click the Runtime Settings tab, scroll to the Runtime Behavior section, and enter your desired record limit number in the Limit number of records shared field.
- Then, scroll down and click the Sys IDs tab. This tab will only appear once you check the box from Step 3.
- Click Update.
Share updates since then
This feature allows you to share only records that have been inserted or updated since the last time the bulk share ran. This is useful for Scheduled Bulk Shares when want to ensure you capture all records changed since the last execution of the bulk share.
This feature will also be applied on: Scheduled Bulk Shares, Run another bulk share like this, and Execute now.
Here's how to turn it on:
- In your sharing ServiceNow instance, go to Perspectium > Perspectium Core > Shares > Bulk Share > View Bulk Shares.
- Find and click into the bulk share (the clickable timestamp) that you want to configure.
- In the resulting bulk share page, click the Runtime Settings tab, scroll to the Triggers section, and check the Share updates since then box.
- Click Update.
Distribute bulk share workload
This feature allows you to distribute the work load of your bulk shares by allowing them to run on multiple nodes in your instance. This is useful if you're running multiple bulk shares or scheduled bulk shares, since they will run on the same node by default, and this could impact performance. If you use this feature, nodes will only be used if they are online ad set to accept "any" scheduler.
Here's how to turn it on:
- In your sharing ServiceNow instance, go to Perspectium > Perspectium Core > Shares > Bulk Share > View Bulk Shares.
- Find and click into the bulk share (the clickable timestamp) that you want to configure.
- In the resulting bulk share page, click the Miscellaneous tab, and check the Advanced box. This will cause an Advanced tab to appear.
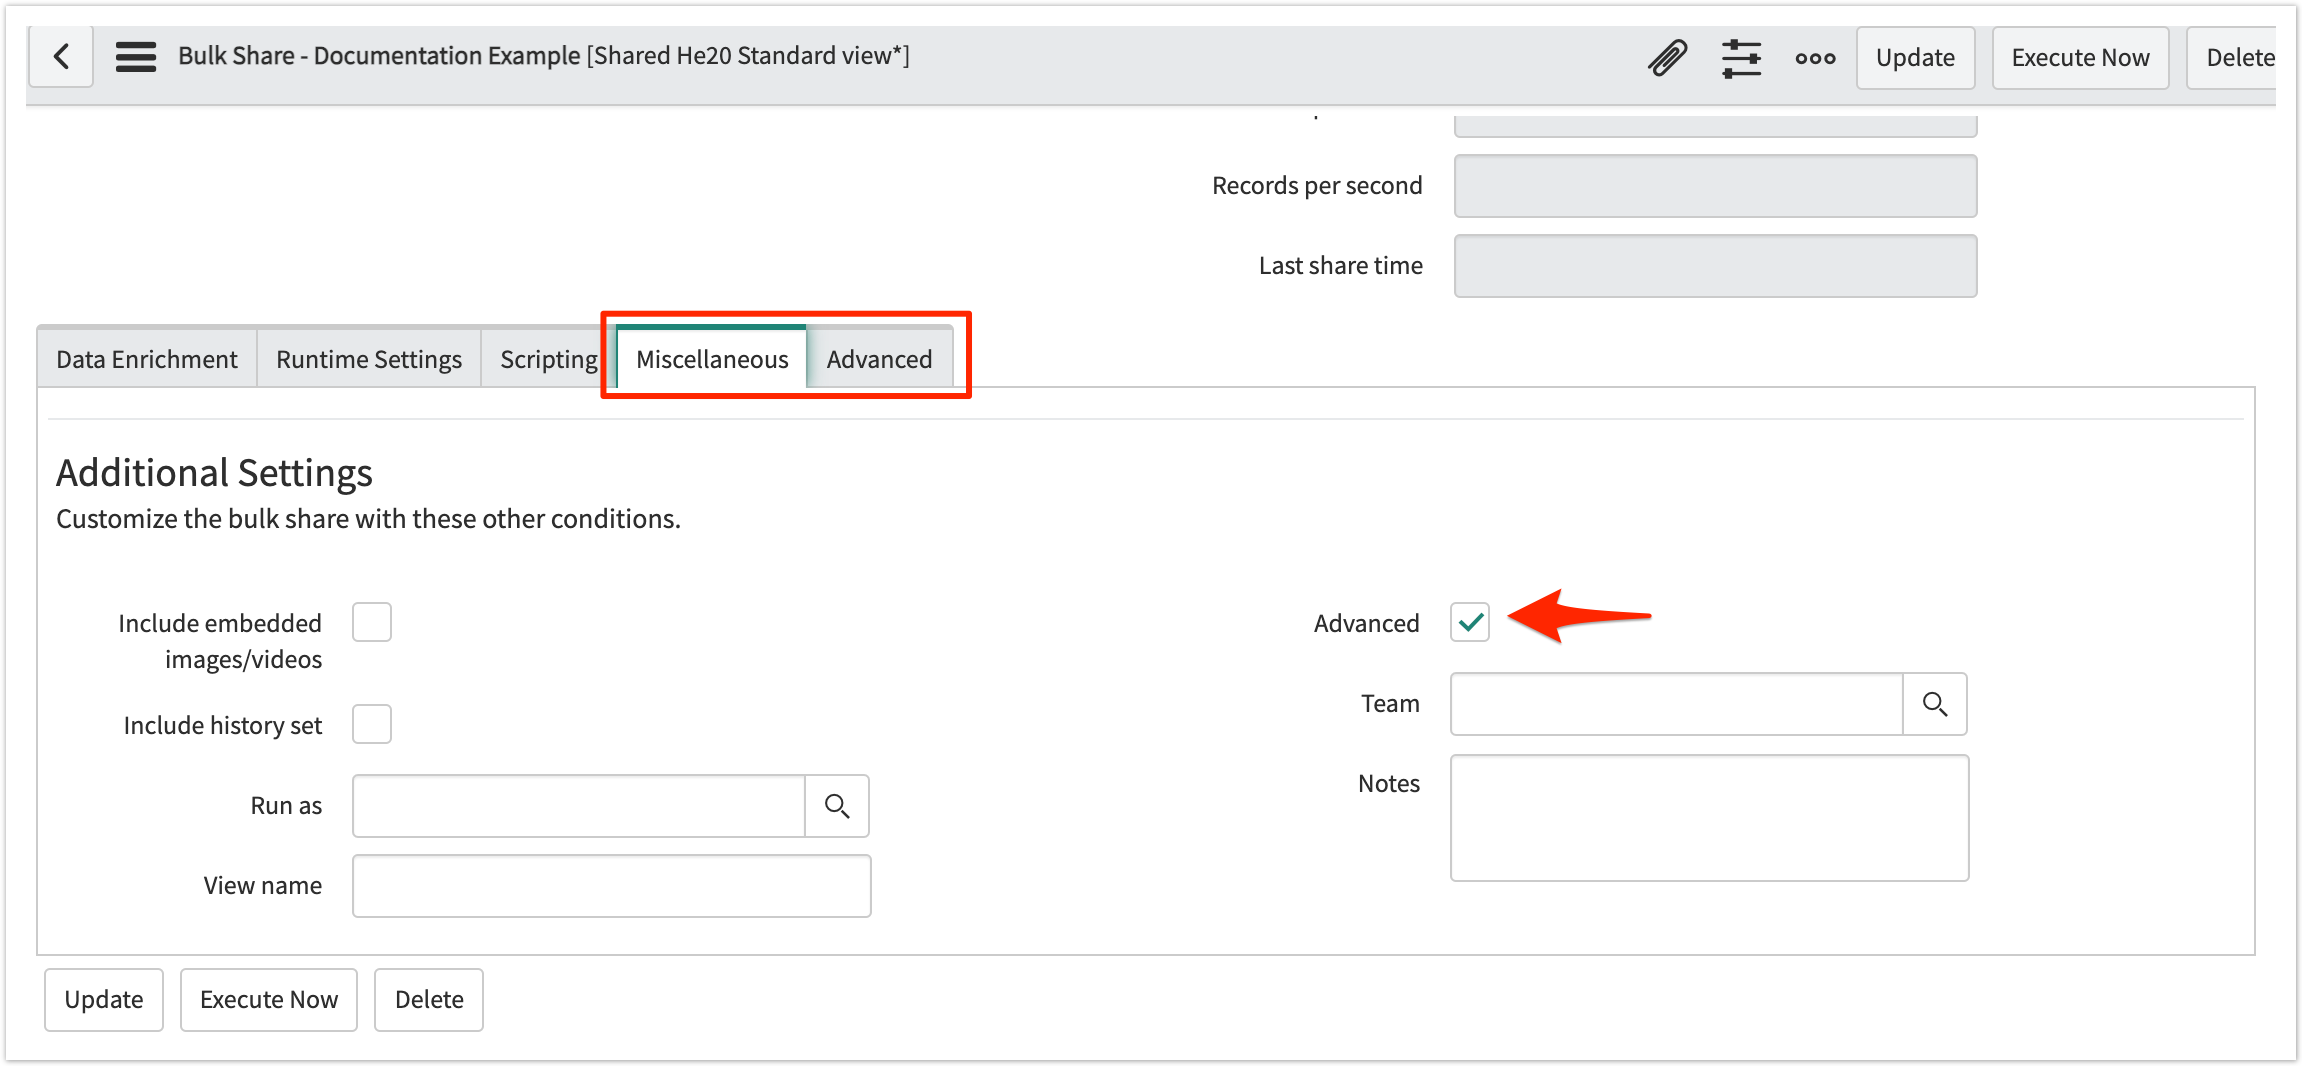
- Click the Advanced tab, and check the Distribute bulk share workload box.
- Click Update.
Multiple bulk share jobs
This feature allows you to choose the number of jobs (1, 2, 4, 7, or 16) it will take to process the bulk shared records. Each job will process a subset of the total records, split by sys_id.
Here's how to customize the number of jobs:
- In your sharing ServiceNow instance, go to Perspectium > Perspectium Core > Shares > Bulk Share > View Bulk Shares.
- Find and click into the bulk share (the clickable timestamp) that you want to configure.
- In the resulting bulk share page, click the Miscellaneous tab, and check the Advanced box. This will cause an Advanced tab to appear (see Distribute bulk share workload for a screenshot).
| Warning |
|---|
This feature is not compatible with the following bulk share features:
|